What is developer options?
Android provide some hidden features for developers to investigate certain things. This hidden features allow developer to have a better interaction with android OS. In another word, You can do a lot with Android from the device itself. But developers need more options. It would be a huge pain to manually move files between devices, run commands, and perform similar tasks all on the phone while developing. Instead, they use tools built into Android Studio and the Android SDK to streamline these processes.
How to enable developer options?
Settings —> About Phone —> Build Number —> Press 8 times
What I get if enable USB Debugging?
Enabling USB debugging grant us many options. For example:
- Bluetooth HCI Snoop Log
- If our application work with bluetooth we can log every single bit of data which is transferred. We can analysis this data via WireShark or similar tools.
- Select mock location app
- Android Mock Location is a feature that allows developers and other users to simulate location data for testing, geo-tagging, and other purposes. It enables apps to send mock location data to the Android location services, reporting that data to other apps and services as if it were real.
- Not supported for all applications. For example we can’t mock location for
GApps.
- USB-Debugging
- USB Debugging is a developer mode in Android phones that allows newly programmed apps to be copied via USB to the device for testing. It is a way for an Android device to communicate with the Android SDK (Software Developer Kit) over a USB connection. It allows an Android device to receive commands, files, and the like from the PC, and allows the PC to pull crucial information like log files from the Android.
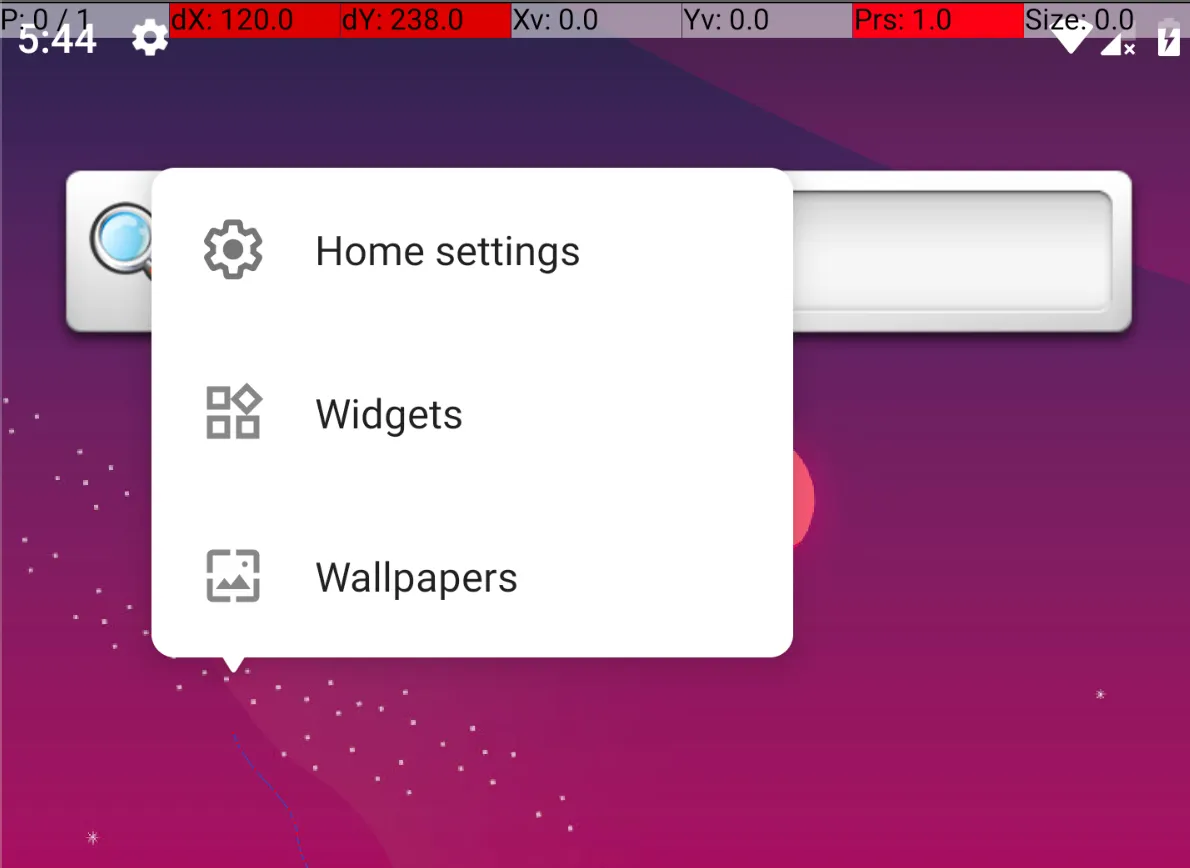
- Showing Pointer Location
- Show us the coordinate of our touches on the screen.
- We use this coordinates to write short scripts to interact with applications and do some automations.
USB Debugging Features
Screen Share
if you want to share screen of your device to your computer. For this we can use scrcpy which used ADB to share screen.
# In macOS
brew install scrcpy
# In linux
apt update && apt install scrcpy
<aside>
💡 In some device beside of enabling USB debugging you should allow file transfer tool
</aside>
Creating Macro via ADB
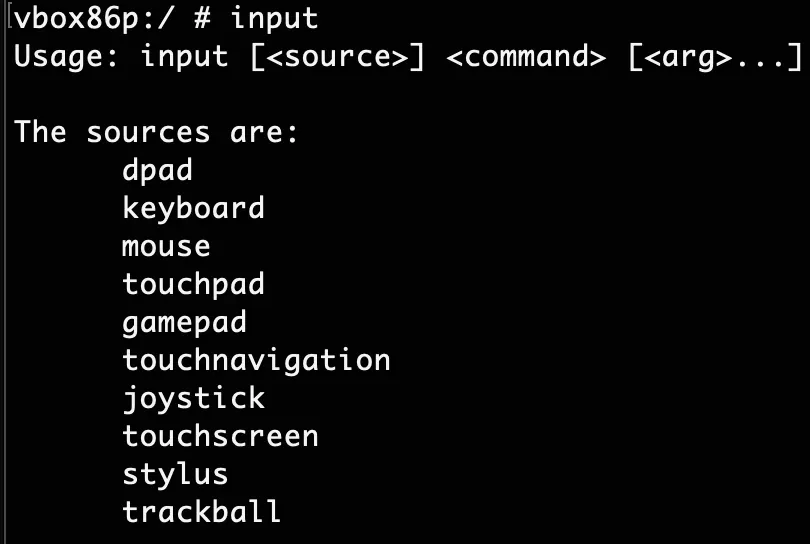
If you open adb shell command you will getting a shell from your phone. In this state enter input and press Enter key.
To click on a point for example click on a coordinate to open call app, you can do this:
input touchscreen tap [x] [y]
But wait! How we can get x and y?
- Go to developer options
- Enable pointer location
Example: Going to apps list, opening Firefox, search for name and press Enter:
input touchscreen swipe 768 2105 816 128 100; input touchscreen tap 1258 1190;sleep 5;input touchscreen tap 619 2294;sleep 1; input touchscreen text "Mohammad Hossein Ashofte Yazdi";input touchpad keyevent ENTER;
Capturing BLE Log via ADB
To enabling bluetooth log do the following steps:
Settings → Developer Options → Enable Bluetooth HCI snoop log → Enabled
<aside>
💡 A Bluetooth HCI (Host Controller Interface) snoop log is a log file that contains all the Bluetooth transmissions that you have made on your android gadget.
</aside>
It’s usually stored in /sdcard/btsnoop_hci.log but it may be different on various devices.
Because this path variant in mobile devices it’s recommended to getting bug-report:
adb bugreport name.zip
unzip name.zip
# The file is loctated on: name/FS/data/misc/bluetooth/logs/btsnoop_hci.log.last
After that you can open this file via Wireshark tool.
<aside>
💡 You don’t need to analysis all the packets. Just look at the part which is not related to host/controller.
</aside>
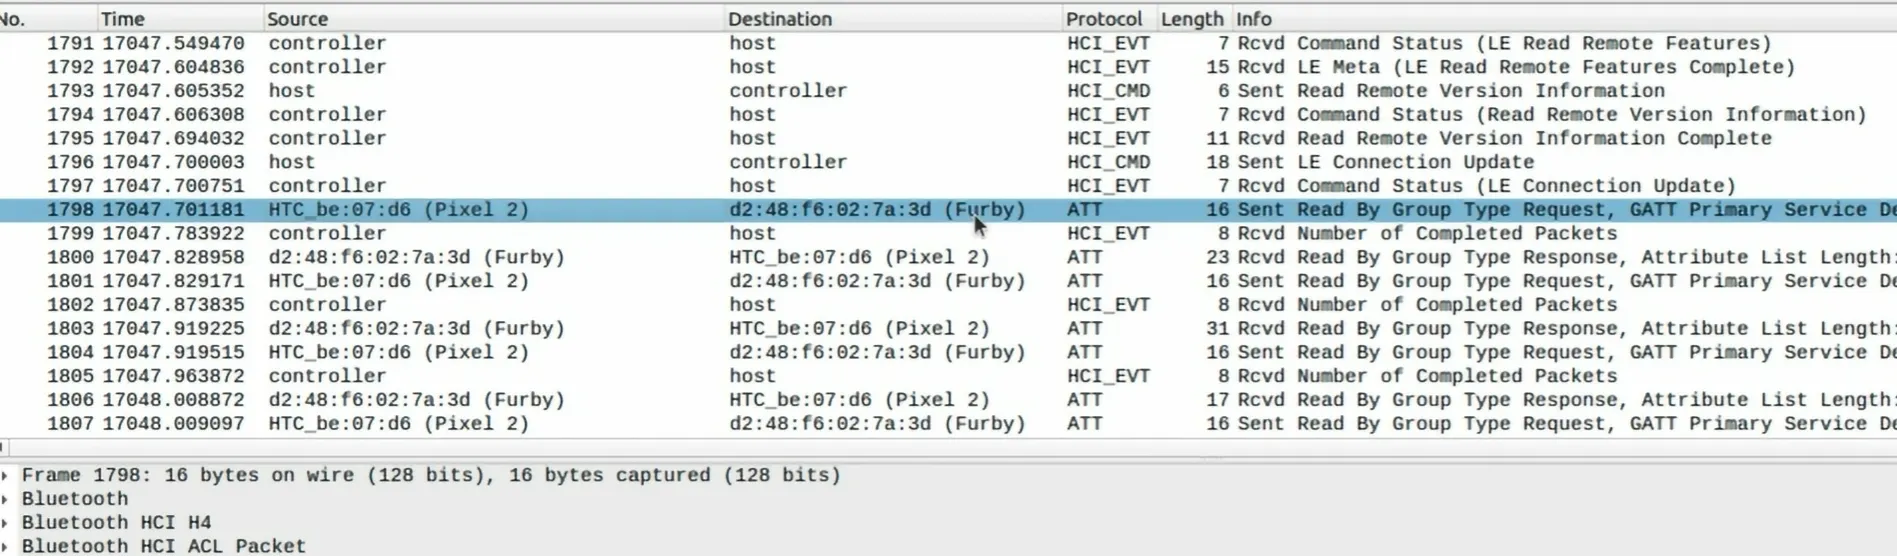
As further analysis you can see in below picture how the phone command to the toy to change the antenna color to the white.
14 → Changing color of Antenna
ffffff → RGB → 3 Byte → White
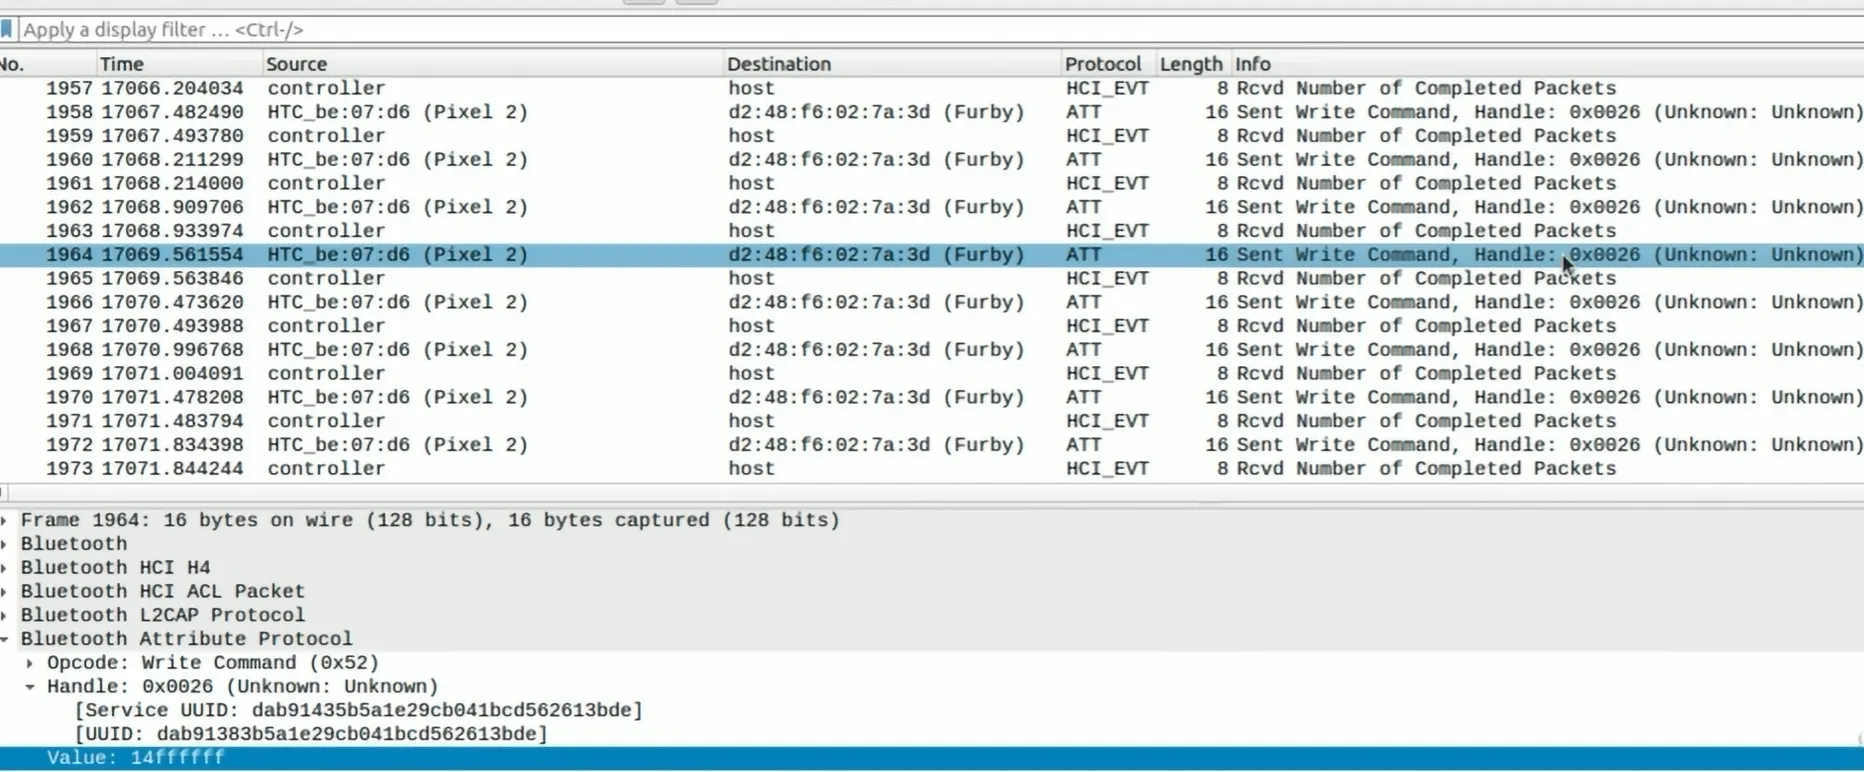
If you want to make sure all this logs is for one connection look at the Handle number. In this example all the packets has same Handle id (0x0026).
How to Send And Receive Bluetooth Packets
In purpose of getting and sending messages via Bluetooth you need a application named nRF. You can download it from this link:
https://github.com/NordicSemiconductor/Android-nRF-Connect
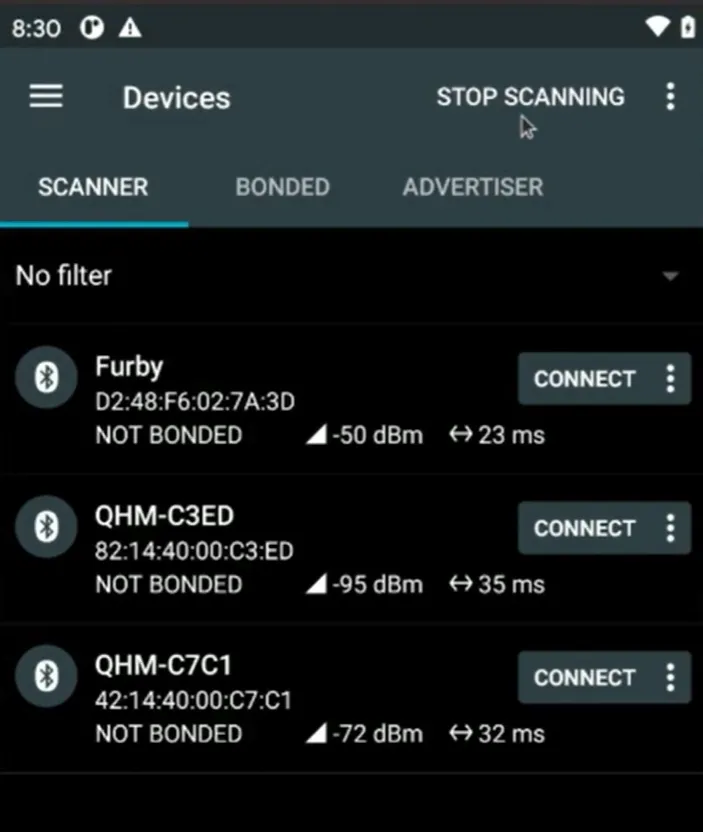
To hacking our sample device (furby) we should first connect to it. After that you can see list of services which is available for interact:
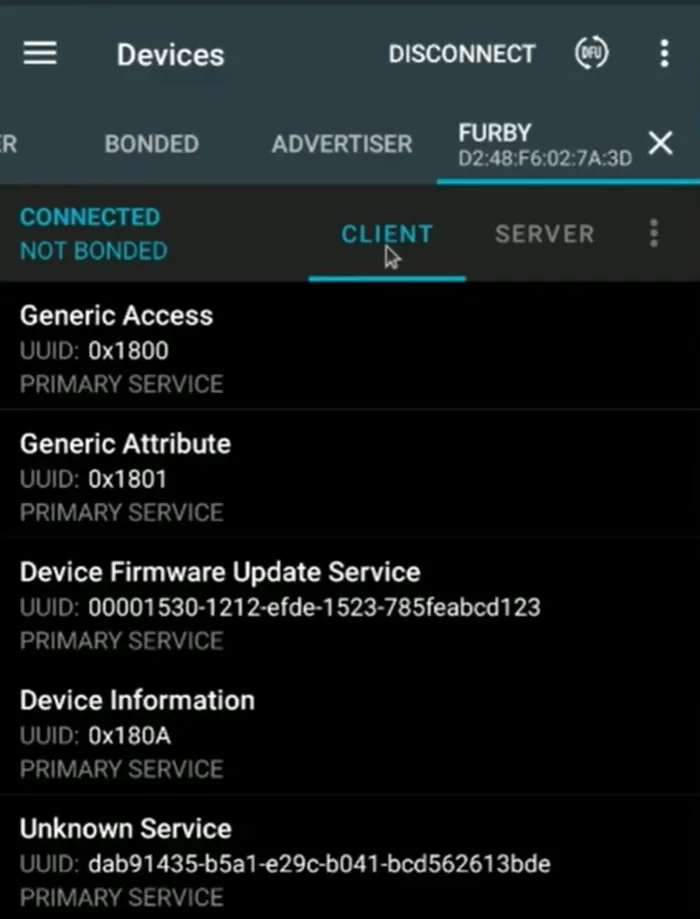
The UUID should be same as the one we found in Wireshark. Click on the service:
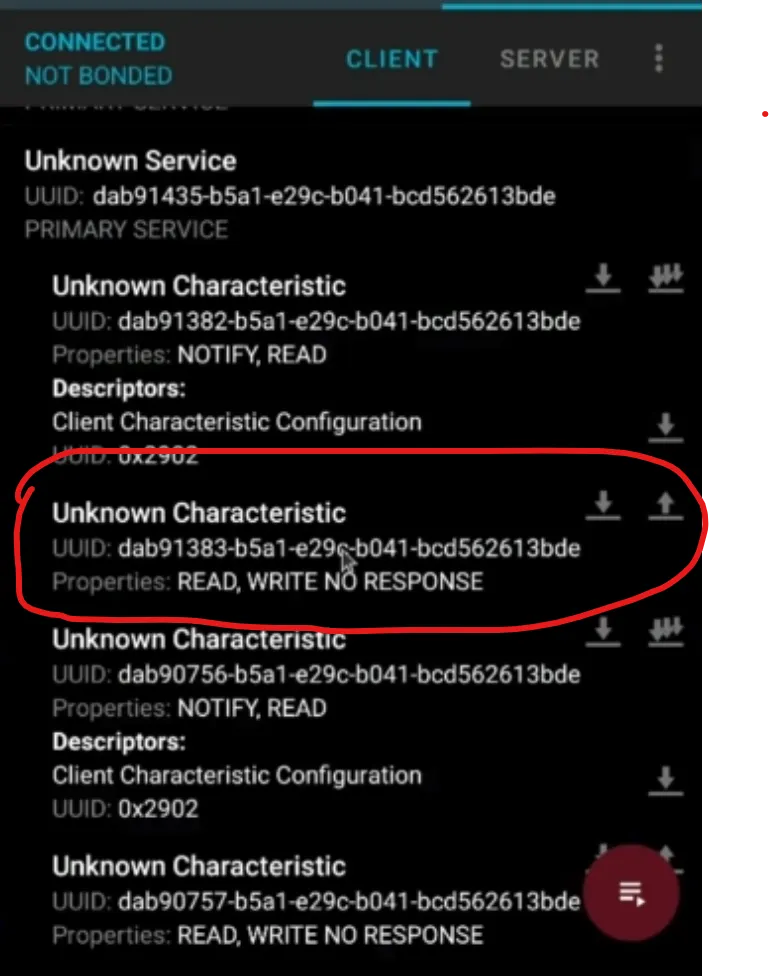
Now you can see all the characteristics available for interact. Click on send command button:
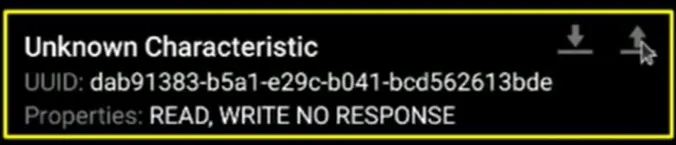
At the end set every RGB value you want: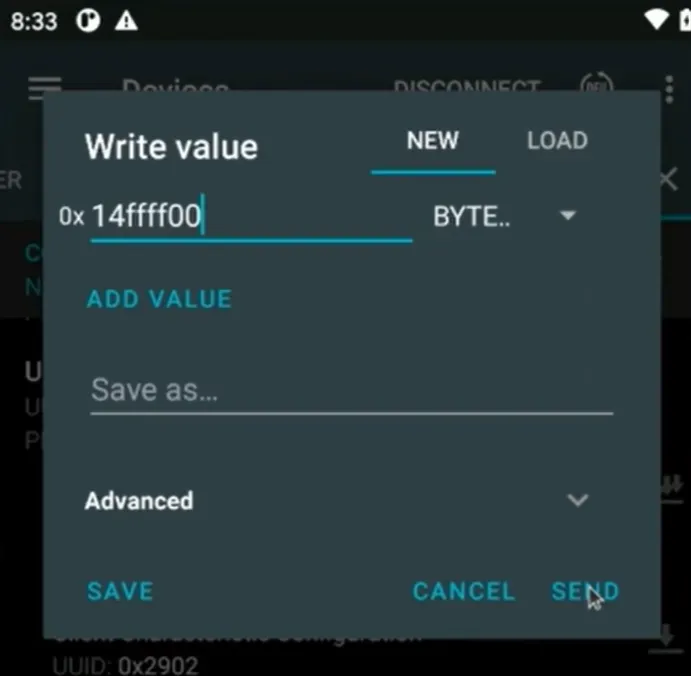
the 14 number is constant and it’s refer to antenna color. The next 3 byte is for RGB.
Android Debug Bridge
Android Debug Bridge (adb) is a versatile command-line tool that lets you communicate with a device. The adb command facilitates a variety of device actions, such as installing and debugging apps. adb provides access to a Unix shell that you can use to run a variety of commands on a device.
ADB Components
- ADB Server
- It installed on our computer when installing android SDK. It’s listen on port 5037. It will start when running ADB command.
- It manages communication between the client and the daemon. The server runs as a background process on your development machine.
- ADB Daemon
- It installed by manufacture on the android device. When you enable USB debugging it will be listen on port 5555.
- It runs commands on a device. The daemon runs as a background process on each device.
- ADB Binary
- It’s in
android_sdk/platform-tools/.
- The client runs on your development machine. You can invoke a client from a command-line terminal by issuing an
adb command.
How ADB Work?
When you start an adb client, the client first checks whether there is an adb server process already running. If there isn’t, it starts the server process. When the server starts, it binds to local TCP port 5037 and listens for commands sent from adb clients.
The server then sets up connections to all running devices. It locates emulators by scanning odd-numbered ports in the range 5555 to 5585, which is the range used by the first 16 emulators. Where the server finds an adb daemon (adbd), it sets up a connection to that port.
Each emulator uses a pair of sequential ports — an even-numbered port for console connections and an odd-numbered port for adb connections. For example:
Emulator 1, console: 5554
Emulator 1, adb: 5555
Emulator 2, console: 5556
Emulator 2, adb: 5557
and so on.
As shown, the emulator connected to adb on port 5555 is the same as the emulator whose console listens on port 5554.
After these steps we run our command for example adb shell whoami. The ADB binary connect to ADB server, The ADB server get the command and send it to ADB daemon and wait for response. ADB server get response and forward it to the ADB binary.
Note about Allow USB Debugging Warning
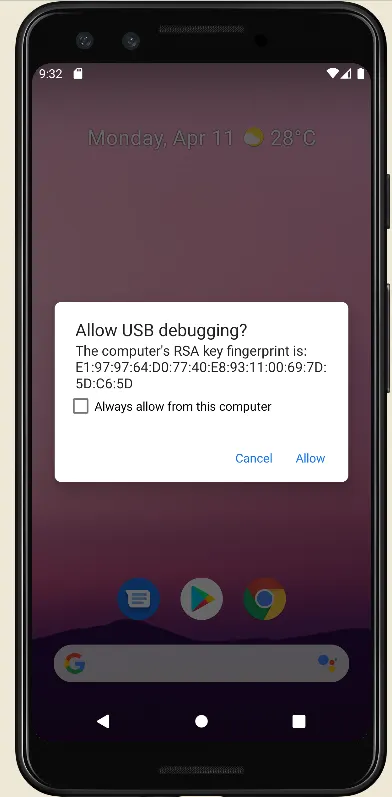
This alert if asking permission to allow the PC/Laptop to connect to this android device. The RSA key which is used for authorizing is stored in both PC/Laptop and android device. To seeing these keys in you PC/Laptop:
- Go to
/home directory
- Press
CTR + h to see hidden files and directories
- go to
.android directory
- You see multiple files. The
abdkey.pub is public key and adbkey is you private key.
Don’t reveal your private key. If attacker could stole it, he/she can access to your device with ADB connection.
PC/Laptop public key is stored in /data/misc/adb/adb_keys path. The laptop send a encrypted message via its public key. If the device cloud decrypt the message then it allow ADB connection.
The ADB protocol is plain-text protocol and it’s not encrypted by default. You can capture this traffic via Wireshark.
Working with ADB
Testing ADB Connection

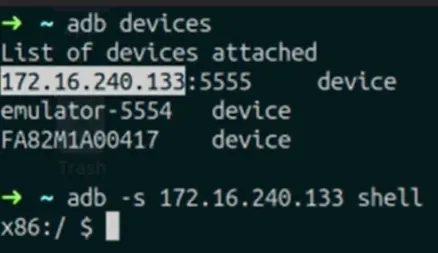
To getting list of available devices:
adb devices
To connecting specific one:
adb -s [serial number] shell
If you connected via IP address, the serial number is the IP address.
Installing APK
adb install app.apk
Installing debug-able apk or apks which made for test:
apkt install -t app.apk
In case of INSTALL_FAILED_TEST_ONLY you should provide -t switch:

Port forwarding using ADB
adb forward tcp:1337 tcp:31415
Every packet which send to 1337 port on your PC will forwarded to 31415 mobile port. To do that vise versa, I mean forward each packet receive on 31415 mobile to 1337 PC you can use this command:
adb reverse tcp:31415 tcp:1337
Push And Pull files using ADB
To upload a file to your android device:
adb push myfile.txt /sdcard/
The host privilege without root only access to /sdcard and /data/tmp paths.
/sdcard point to internal devices disk.
App And Device Logs
You can get applications and devices log via logcat. It’s important to save all logs of application and analysis them. For this purpose you should open enter adb logcat and store result in a file. Then opening the app. After investigating on the application, close the app and then close the logcat .
adb logcat
Do you want more beautiful log? use pidcat.
https://github.com/JakeWharton/pidcat.git
Restarting ADB Server
To restart of ADB server in case any trouble or bug, you can use abd kill-server command. After that use adb shell to start ADB Server automatically.
adb kill-server
adb shell
Running adbd Service as Root
In some cases you need to running adbd service as root. For example you want to push some files in /data/data directory. Or you want working with some files and folders which you doesn’t have permissions by default. In these cases you can run adbd service with root user by using adb root command.
abd root
Getting Backup
Backup everything including APKs data and excluding system apks and files.
adb backup -f all -all -apk -nosystem
