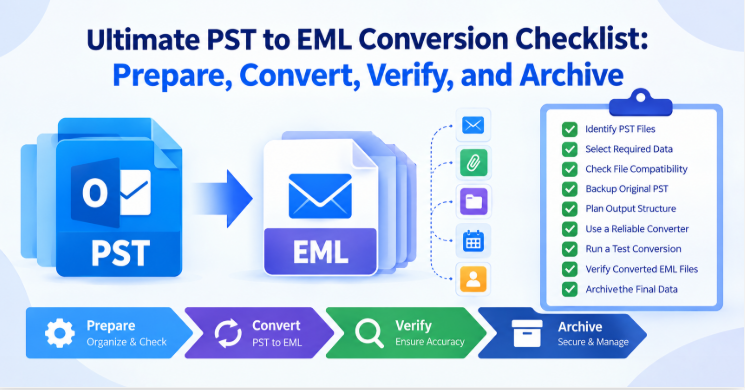
Converting Outlook PST files to EML can be helpful for reasons such as transferring emails from Microsoft Outlook to an EML-compatible email client, creating portable email archives, or accessing messages outside Outlook. But conversion of PST file is not sufficient. A proper migration process should include preparation, data selection, conversion, verification and safe archiving.
What to verify before, during and after PST to EML conversion? This checklist will describe how to preserve important emails, attachments, folder structures and message details organized.
1. Locate All PST Files
Before starting the conversion, take an inventory of your Outlook PST files.
[ ] Find active PST files
[ ] Search for archived PSTs
[ ] Search for older backup copies
[ ] Locate PST files that are saved on external drives
[ ] Record approximate size of each PST
[ ] Name each file descriptively if necessary
For example, if an organization has PST archives from 2018 to 2025, segregate them employee, department, year or project-wise. This makes it easier to decide which files need to be converted.
2. Choose Which Email Messages to Convert
Not all messages inside a PST have to necessarily become an EML-file.
[ ] Determine if you need the full mailbox
[ ] Identify key folders (Inbox, Sent Items, Projects, etc.)
[ ] Remove unnecessary duplicate archives from conversion list
[ ] Decide if Contacts, Calendars or other non-email data need special handling
[ ] Decide if conversion should be all or selective
If only some emails are required, selective conversion may significantly decrease the amount of output data.
3. Verify PST Files Before Converting
During migration, problems can arise due to damaged or inaccessible PST.
[ ] Confirm PST is locatable and accessible
[ ] Confirm Outlook can open the file, if Outlook is present
[ ] Look for missing folders or files that are unusually large
[ ] Find password protected or encrypted PST files
[ ] Determine whether PST is ANSI or Unicode
Do not edit the original files. Make a backup if possible before starting the conversion.
4. Safeguard the Original PST Files
One of the most important checklist items is making a separate backup.
[ ] Backup the original PST to another secure location
[ ] Do not experiment on the only copy
[ ] Retain a copy until the EML output has been fully verified
[ ] Record original file name and size
[ ] Place original PST in read-only or protected storage where possible
The converted EML files should be considered a new copy of the email data, rather than a replacement of the original PST.
5. Build the EML Output Structure
EML files are individual email message files. It is very important to have them organized when you are converting thousands of messages.
[ ] Create separate output directory
[ ] Folders for plans by department, project, year, or mailbox
[ ] Determine organization of Inbox, Sent, Drafts, and custom folders
[ ] Ensure sufficient storage capacity
[ ] Do not store converted files in temporary folders
A clear folder structure will make it much easier to search and archive in the future.
6. Select Conversion Method
Now decide whether a manual process or a specific conversion program is appropriate.
Manual methods are possible for a limited number of emails, but the larger PST archives can take several steps and can be difficult to manage. If you need to process a batch, filter, preview or convert without installing Outlook, a dedicated converter may come in handy.
supports single or multiple PST files, preview mailbox data, selective filtering, attachments, and keep original folder structure. According to the product documentation, it can also work without installing Microsoft Outlook.
7. Conduct a Small Conversion Test
Perform a trial before converting the full archive.
[ ] Select a small PST or a limited folder
[ ] Preview emails available for preview
[ ] Transform a sample of messages
[ ] Open some of the resulting EML files
[ ] Refer to attached files
[ ] Compare sender, recipient, subject and date info
[ ] Confirm that the folder organization is clear
Running a test will allow you to detect any problems with the output or the organization before you process the entire archive.
8. Change the Required PST Data
If the test is successful, proceed to the main conversion.
A typical workflow would be:
- Turn on the converter.
- Choose File Mode or Folder Mode, depending upon the number of PST files.
- Select and add required PST files.
- Preview the contents of the mailbox.
- Choose the folders or emails you want to convert.
- If you need only certain data, apply existing filters.
- Select the output location.
- Start the PST to EML conversion.
For large archives, don’t mix too many unrelated projects into one output directory.
9. Check Converted EML Files
Conversion is not complete until the results have been verified.
[ ] Compare the number of emails received vs converted
[ ] Open random EML message from different folders
[ ] Verified attachments
[ ] Check To, From, CC, BCC, subject and date information
[ ] Check email body format
[ ] Confirm folder and sub-folder organization
[ ] If applicable, review the conversion log
Check out test messages from different times, not just the latest emails.
10. Properly Archive EML Data
Sort the final EML archive after verification.
[ ] Create a logical naming scheme
[ ] Separate finished archives from temporary conversion files
[ ] Keep the original PST backup file
[ ] Store important archives in a secure place
[ ] Keep a second copy of important business records
[ ] Record date of conversion and source PST
If the EML files are from another email client try importing a small sample before importing the entire archive.
Final PST to EML Checklist
Before you think the project is over, see:
[ ] All necessary PST files are located
[ ] Original PST files backed up
[ ] Selected required emails & folders
[ ] PST compatibility verified
[ ] Output folders prepared
[ ] A test conversion was made
[ ] Attachments were verified
[ ] Email properties were checked
[ ] Folder structure verified
[ ] Conversion logs checked and OK
[ ] EML files opened successfully
[ ] Final archives have been backed up
Conclusion
Successful PST to EML migration is not about a conversion button. By preparing the source files, deciding what to export, testing the output, verifying important messages, and archiving the results securely, you can prevent many common migration problems.
If you are working with multiple PST files or large Outlook archives, TrustVare PST to EML Converter provides options to preview, selective filtering, batch PST processing, attachment conversion and preserving folder-structure features. The checklist above can help to organize the whole process and make it easier to verify.