Hey guys, so in this post, we will be learning about one of the most powerful which comes first in the mind of all cybersec professionals and this tool is “Ghunt”.

What is Ghunt?
According to its creators, GHunt (v2) is an offensive Google framework, designed to evolve efficiently. It’s currently focused on OSINT, but any use related to Google is possible.
Features :
- CLI usage and modules
- Python library usage
- Fully async
- JSON export
- Browser extension to ease login
Tool Link - https://github.com/mxrch/GHunt
In my opinion - It’s a gem or a goldmine, why?
Let me first describe how and in what ways we can use it.
Case 1 - Imaging you got a call from an unknown number and the other person is misbehaving or doing a kind of prank, and you are interested in knowing his real identity, wanted to know who is he, what he does, etc. Now you may be thinking how can Ghunt help in this for using Ghunt, we need to know the Gmail of another person, which in this case, we don’t know. Wait, that’s not the case, when you are my student, in my upcoming writeup, I will reveal the techniques I use to find someone’s gmail by just knowing his phone number, and guess what, that has given me 100% success to date.
Case 2 - You have wanted to person osint on a victim and the thing you know is only Gmail, so Ghunt here can help you in increasing the attack surface.
There are many other cases where you wanted to gather information about someone and the only thing you knows is his Gmail. So, it’s no lie, if we call Ghunt a savior. Now, let’s move to the next part i.e the installation.
Installation -
Step1 - Check if your package repository is updated.
sudo apt update
Step 2 - Install the pipx tool.
pip3 install pipx
Step 3 - Set path environment variables.
pipx ensurepath
Step 4 - Install the Ghunt
pipx install ghunt
Step 5 - Setup the login process.
ghunt login
Step 6 - Choose the option 2 i.e Paste base64-encoded cookies
Choice => 2
Step 7 - Getting base64 encoded cookies. Download the appropriate browser extension.
Google Chrome
Firefox
Step 8 - Open the chrome extension, and click on synchronize to ghunt, it will ask you to log in a google account, and enter the credentials of any dummy account.
Step 9 - Choose the option for getting base64-encoded cookies.
Step10 - copy the cookies and paste them into ghunt as asked in step6.
If everything has been done correctly, ghunt will show you cookies seems valid, the account is authenticated.
Congo, ghunt installed successfully.
How to use?
usage: ghunt [-h] {login,email,gaia,drive} ...
positional arguments:
{login,email,gaia,drive}
login (--clean) Authenticate GHunt to Google.
email (--json) Get information on an email address.
gaia (--json) Get information on a Gaia ID.
drive (--json) Get information on a Drive file or folder.
options:
-h, --help show this help message and exit
Simplified form -
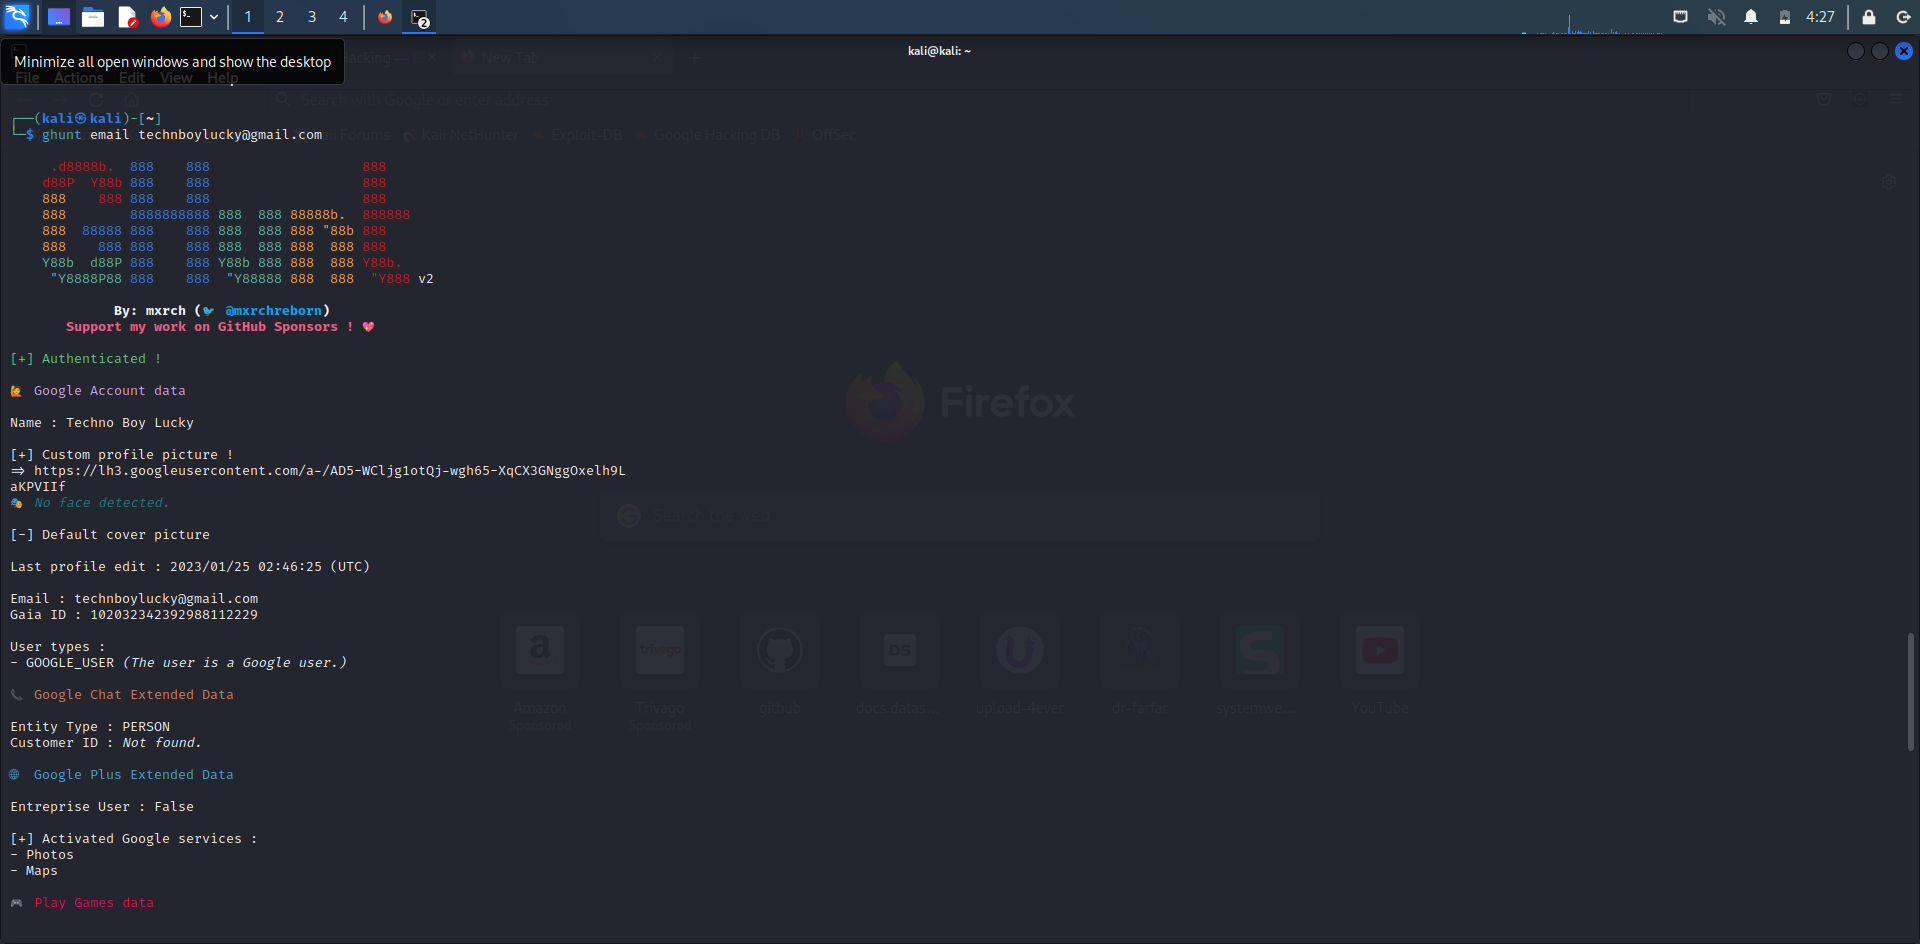
ghunt email myemail@gmail.com
Practical View -
The time to know what information it will give is as follows -
- Name
- Custom profile picture
- Default cover picture
- Gaia ID
- User type
- Google Chat data
- Google plus data
- Activated google services
- Play games data
- Maps and Calender data
Note - How much data it will give totally depend on the given email and varies from email to email.
That is it for today, in the next blog, we will learn how to find anyone’s gmail by just knowing his phone number.
Follow on Twitter: https://twitter.com/Dheerajydv19