
Introduction
Are you ready to become a master of cybersecurity and uncover hidden vulnerabilities in computer systems? Look no further than Kali Linux, the ultimate hacking and penetration testing tool professionals use worldwide. But before you can start using Kali to its full potential, you must know how to boot it live from a USB. This guide will show you how to transform your USB stick into a powerful hacking machine you can take anywhere. So if you’re ready to unlock the full power of Kali Linux and unleash your inner hacker, keep reading!
Requirements
To get started with booting Kali Live from a USB, you’ll need a few things:
👉️ Rufus: You can download this tool from here.
👉️ Kali Live: You can download the latest version from the official Kali Linux website here.
👉️ USB Drive: Ensure your USB drive has at least 8GB of storage.
Note: While you can use any alternative tool and operating system you prefer, we’ll use Rufus to boot the USB with Kali Linux Live in this guide. Let’s get started!
Installing Rufus
- Download Rufus’s latest version using this link!
- Plug in your USB drive and open Rufus after downloading it.
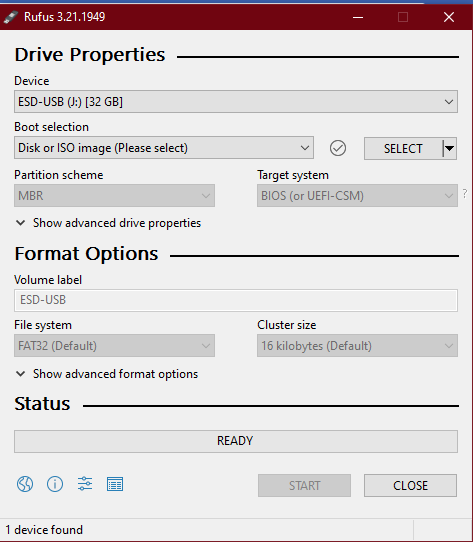
- Download Kali Live using this link!
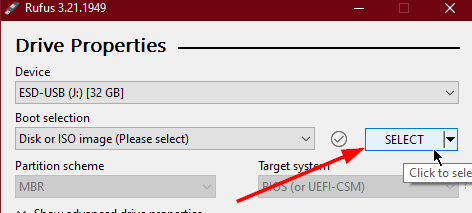
- Then click on Select and then choose Kali Live ISO from the location where you saved the downloaded file as shown below:
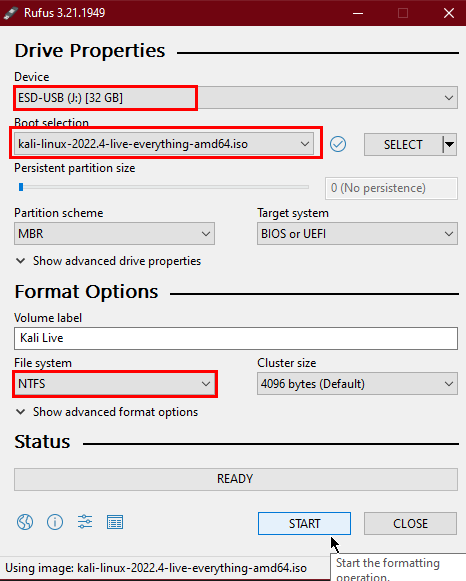
Note: You can change the configuration settings, but default options will work neatly.
- Click the START button, select the Write in ISO Image mode (Recommended) option, and click OK.
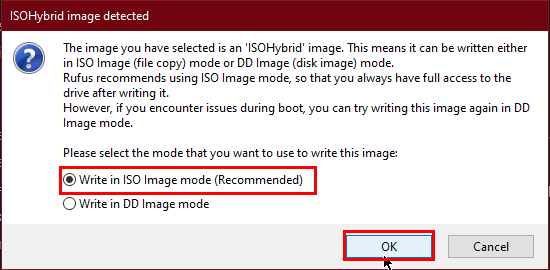
Note: If pop-ups appear, click OK and continue the process.
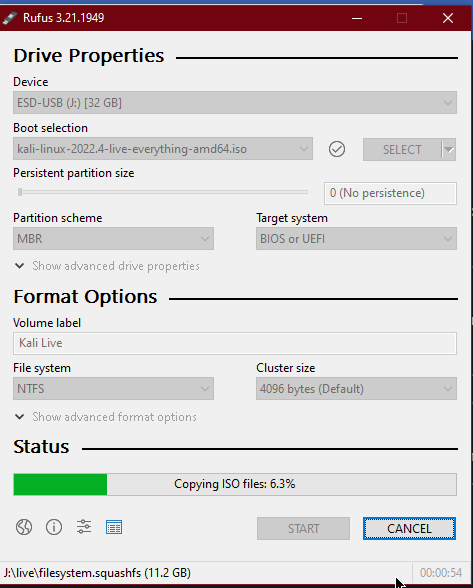
Let’s grab a coffee and wait for it to get booted.

Voila! Our Kali Live is ready to boot, and you can use it now.
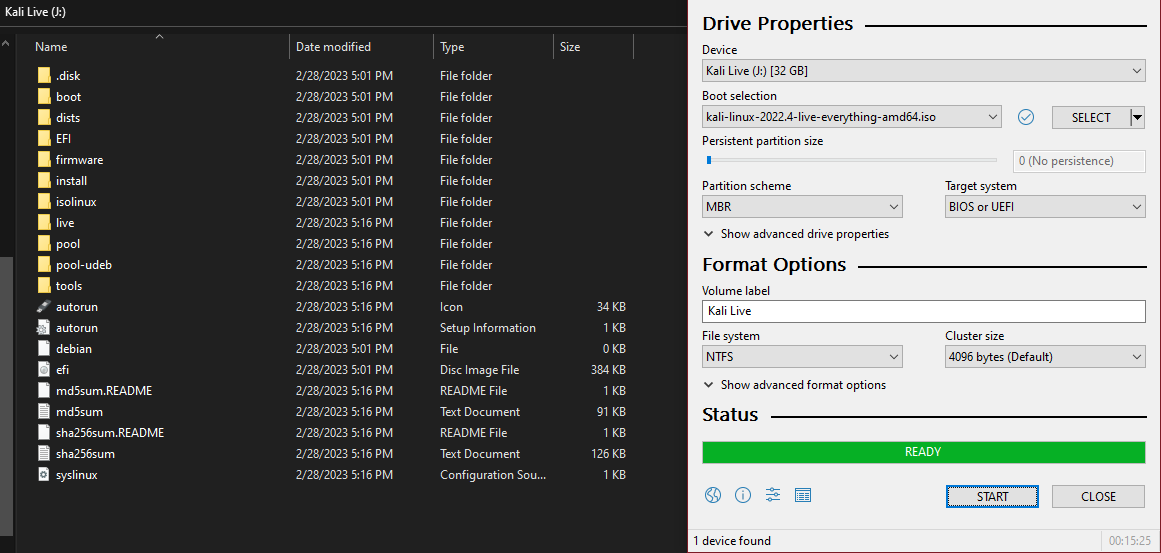
- Now that you have created a bootable USB with Kali Live, it’s time to boot your computer from it. Here’s what you need to do:
👉️ Plug in your USB drive.
👉️ Restart your computer.
👉️ Press the Boot Options key when your computer is booting up. This key differs depending on your brand and PC model. Standard keys include F2, F12, and Esc. Consult your computer’s manual or search online to find the exact key for your system.
👉️ Once you enter the boot options menu, select the option to boot from your USB drive.
👉️ Select Kali Live from the list of options and hit enter.
With these simple steps, you should now be able to boot Kali Live from your USB drive and start using its powerful tools for hacking and penetration testing. Happy hacking!

Closure
Congratulations! You’ve successfully learned to boot Kali Live from a USB drive and turn it into a powerful hacking and penetration-testing tool. With Kali Linux at your disposal, you’re now equipped to take on various cybersecurity challenges and become a true master of your craft.
But remember, with great power comes great responsibility. Always use your hacking skills ethically, and never use them to harm or exploit others. As long as you use Kali Linux for good, you’ll be on your way to becoming a valuable asset in the world of cybersecurity.
Thank you for reading this guide, and we hope it has been helpful in your journey to becoming a cybersecurity pro. If you have any questions or comments, please leave them below.

Follow me on LinkedIn! 👈️
Thank you for reading! Happy hacking!