
⭕ Introduction :
Welcome back to the third blog in our “Linux for Hackers” series. Today, we’ll explore Logical Volume Management (LVM) and managing hardware in Linux.
LVM is a flexible storage management system that lets us handle disk space dynamically. It’s a must-know tool for hackers and system administrators. We’ll cover everything from creating and resizing logical volumes to working with snapshots and mirroring.
In addition, understanding how to manage hardware in Linux is crucial for effective hacking. We’ll dive into device files, module management, and optimizing hardware components for peak performance.
By the end of this blog, you’ll have a solid grasp of LVM and the skills to efficiently manage hardware in your Linux environment. Let’s dive in and unlock the power of Linux for hacking purposes. We’ll discuss the basics of LVM, how to create and manage logical volumes, and how to use Linux to optimize hardware performance.
🐧Logical Volume Management In Linux (Lvm) :
📌 What is lvm?
Logical Volume management is an option available when creating partitions on Linux Hard Drives. Lvm is the best alternative to old partition types and is the most used partition type while setting up servers.
⚡Why use Lvm?
The main functionality lvm provides scalability, in another partition type to increase the space or storage, firstly you would have to shut down the whole server then secondly take a backup of the whole system, and then would have to add a hard-drive and then you would have to re-create partitions. This problem was solved by using lvm, by using lvm you can easily increase storage in the running server and resize the partitions easily as well.
Other features of lvm :
- Dynamic allocation: LVM operates at the logical volume level rather than the physical volume level. This means you can create logical volumes that span across multiple physical volumes, providing more efficient use of disk space. Traditional partitions, on the other hand, are fixed in size and tied to a specific physical volume.
- Online management: LVM allows for the online management of logical volumes. You can perform operations such as extending or shrinking volumes, creating snapshots, or migrating data between physical volumes without requiring system downtime. Traditional partitioning schemes often require unmounting the partition and performing offline operations, which can disrupt the system’s availability.
- Snapshots: LVM provides the ability to create snapshots, which are read-only point-in-time copies of a logical volume. This feature is useful for making backups or creating consistent views of data for database backups. Traditional partitioning schemes do not have built-in snapshot capabilities.
🔥 Apart from these, there are various other features of Lvm but the main highlighted one is Flexibility allowing us to shrink and extend volumes without repartition the entire disk and taking the server down.
⚡Working of Lvm
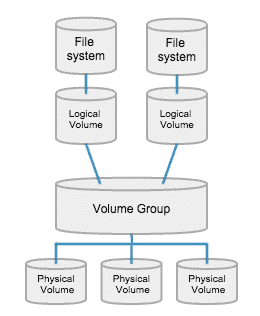
Identifying Physical Volumes (PVs): The first step is to identify the physical storage devices that will be used with LVM. These devices can be hard drives (HDDs), solid-state drives (SSDs), or partitions on these devices. Each identified device or partition is designated as a Physical Volume (PV).
Creating Volume Groups (VGs): Once you have identified the PVs, you can combine them into a Volume Group (VG). A VG acts as a pool that consolidates the available disk space from the PVs. You can think of it as a virtual container for the PVs. You can create multiple VGs depending on your requirements.
Creating Logical Volumes (LVs): Within the Volume Group, you can create Logical Volumes (LVs). LVs are analogous to partitions in traditional partitioning schemes but offer more flexibility. LVs can be resized dynamically, allowing you to allocate or deallocate disk space as needed without disrupting the data stored on them.
Formatting Logical Volumes: Once the LVs are created, you can format them with a filesystem of your choice. Formatting prepares the LVs for storing files and directories. Common filesystems used with LVM include ext4, XFS, and Btrfs.
Mounting and Using Logical Volumes: After formatting the LVs, you can mount them to specific directories in the file system hierarchy. This allows you to access and use the logical volumes as if they were regular partitions. You can create directories, store files, and perform file operations on them.
📌 Creating Lvm Configuration
⚡Creating Physical Volumes
Disk partitions or even entire disks are physical LVM volumes. To use an entire existing partition, Using fdisk we will assign it a partition type to lvm.
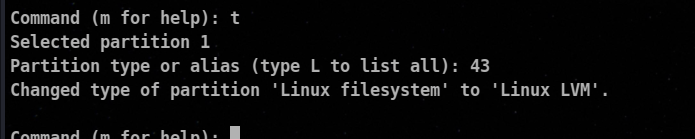
🔥 with 8e or 43 you can assign the partition type to lvm.
Once you have determined which disks or partitions to use, we will use pvcreate to define them as physical volumes.

you can define the whole disk as physical volume as well
sudo pvcreate /dev/sdb
Viewing Physical Volumes
We can use pvscan command to view all the physical volumes

⚡Creating Volume groups
A Volume Group is created by combining multiple PVs, which can be physical disks, partitions, or even virtual storage devices. The PVs within a Volume Group contribute their available disk space to the VG, forming a collective storage pool.
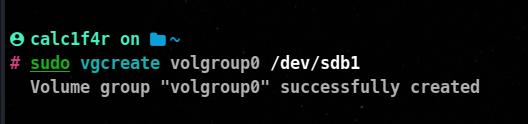
The vgcreate utility is used to create volume groups.
Syntax :
sudo vgcreate volumegroup_name physical_volumes

📌 Create Logical volumes
In simple words, a Logical Volume (LV) in Logical Volume Manager (LVM) is like a virtual hard drive or a partition that you can create within a pool of physical storage. It’s a way to divide and manage your available disk space. You can choose the amount of hard disk you want to create and mount the filesystem after formatting it with a filesystem type.
lvcreate -L volume_size -n <volume-name> <volume_group_name>

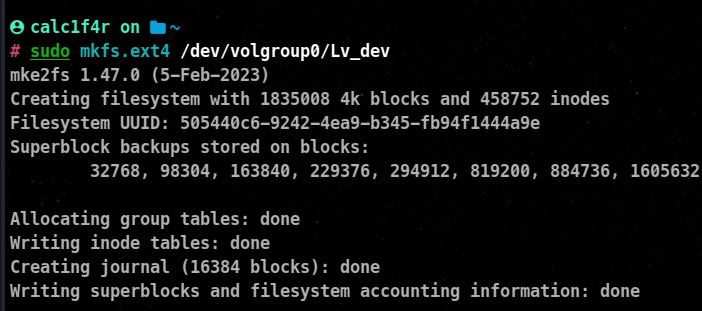
Here we have created a logical volume of 7GB named Lv_dev form from our volume group.
Viewing logical volumes
We can use lvscan utility to view the logical volumes present in the system.

As you can see now the free space in volgroup0 has been decreased.

⚡Creating the filesystem on the partition
Creation of filesystem has been discussed in the previous series of this blog.
The location of the logical volumes: /dev/volgroup_name/logical_volume_name
📌 Mounting Filesystem
Mounting has also been explained in the previous blog of the series.

📌 Manging Lvms
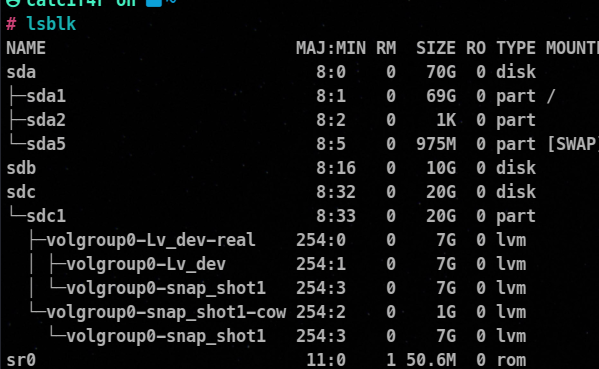
To demonstrate I have added an additional 10gb Disk so the naming of the disk has been modified. The old /dev/sdb in the demonstration is now /dev/sdc.
⚡Extending Volume Group
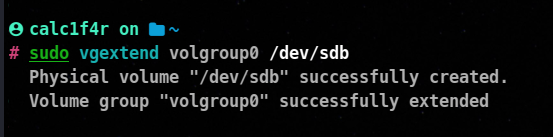
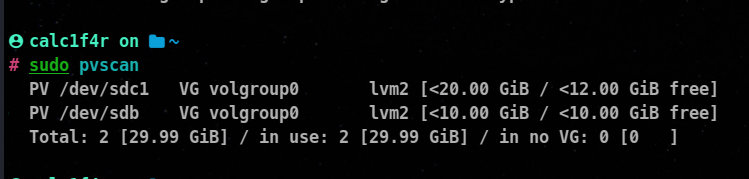
The vgextend command is used to extend an existing volume group (VG) in the Logical Volume Manager (LVM) on Linux systems. Extending a volume group allows you to incorporate additional physical volumes (disks or disk partitions) into the existing volume group, thereby increasing its storage capacity.
Here’s the syntax and an example of how to use the vgextend command:
vgextend <vg_name> <physical_volume>
<vg_name> is the name of the volume group you want to extend.<physical_volume> refers to the path of the physical volume (disk or disk partition) that you want to add to the volume group.
⚡Reducing Volume Group
The vgreduce command is used to remove physical volumes from a volume group (VG) in the Logical Volume Manager (LVM) on Linux systems. When a physical volume is removed from a volume group, the storage capacity of the volume group is reduced accordingly. Here’s the syntax and an example of how to use the vgreduce command:
vgreduce <vg_name> <physical_volume
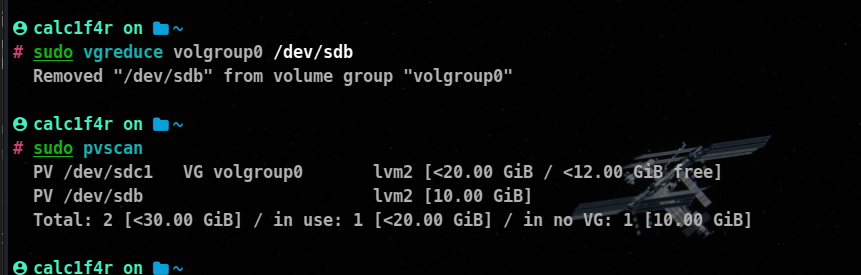
As you can see that /dev/sdb has been removed from the volume group.
⚡Removing a volume group
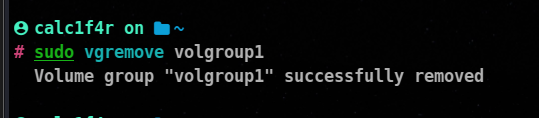
The vgremove command is used to remove a volume group (VG) from the Logical Volume Manager (LVM) on Linux systems. When a volume group is removed, all logical volumes within the volume group and their associated data are also removed. Here’s the syntax and an example of how to use the vgremove command:
vgremove <vg_name>
⚡Reducing Logical Volumes
The lvreduce command is used to reduce the size of a logical volume (LV) in the Logical Volume Manager (LVM) on Linux systems. When you reduce the size of a logical volume, the available space within the volume is decreased. Here’s the syntax and an example of how to use the lvreduce command:
lvreduce <lv_path> -L <size> [-r]
-r option is used to resize the file system within the logical volume after reducing its size. This option is only necessary if the logical volume contains a file system that can be resized.
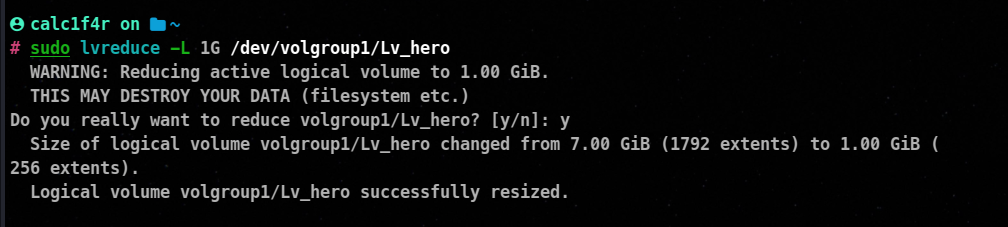
here we have not used -r switch so we will have to take the help of resizefs utility
resizefs /dev/volgroup1/Lv_hero
📌 Removing a Logical Volume
The lvremove command is used to remove a logical volume (LV) from the Logical Volume Manager (LVM) on Linux systems. When a logical volume is removed, all data stored within the volume is permanently deleted. Here’s the syntax and an example of how to use the lvremove command.
lvremove <lv_path>

⚡Extending a logical volume
The lvextend command is used to extend the size of a logical volume (LV) in the Logical Volume Manager (LVM) on Linux systems. When you extend the size of a logical volume, you increase the available storage capacity within the volume. Here’s the syntax and an example of how to use the lvextend command:
lvextend <lv_path> [-L <size>] [-r]
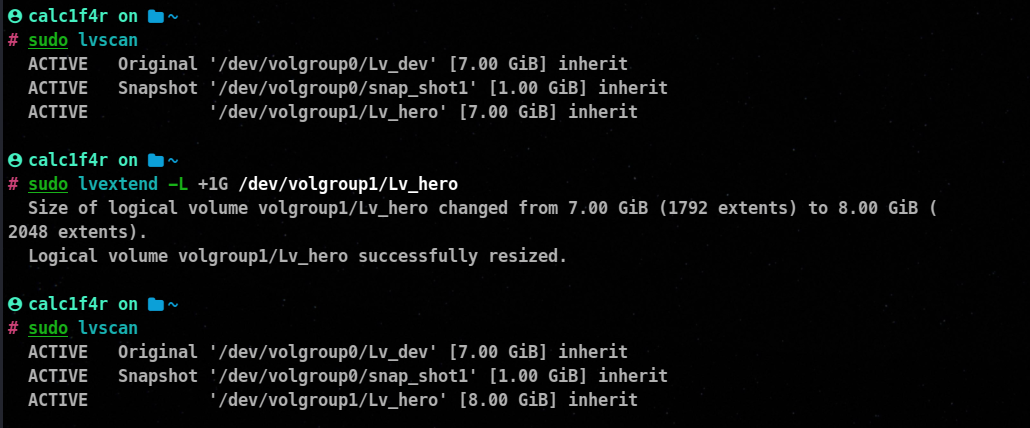
Here also we have not used -r switch so we will take the help of resizefs command.
resizefs /dev/volgroup1/Lv_hero
📌 Lvm Snapshots
Imagine you have important data on your computer, such as files, documents, or a database. You want to make sure you have a backup or a copy of this data, but you don’t want to interrupt the ongoing operations or modify the original data. Just like that in the case of storage lvm snapshots help us to keep up a backup of all the data.
It can help if your system crashes or anything else happens.
📌 Creating Snapshot volumes
To create an LVM snapshot, you can use the lvcreate command with the appropriate options. Here’s an example of the syntax:
lvcreate -L <snapshot_size> -s -n <snapshot_name> <original_lv_path>
<snapshot_size>: Specify the size of the snapshot. You can use units like ‘G’ for gigabytes or ‘M’ for megabytes. For example, ‘10G’ for 10 gigabytes.-s: This option indicates that you are creating a snapshot.-n <snapshot_name>: Provide a name for the snapshot. Choose a meaningful name to easily identify it later.<original_lv_path>: Specify the path of the original Logical Volume (LV) you want to create a snapshot of. It typically follows the format /dev/<vg_name>/<lv_name>.
Let’s break down the components:

You can allocate snapshot space into logical volume. Make sure to allow enough space to hold data changes; otherwise, if it gets full, data will be lost.
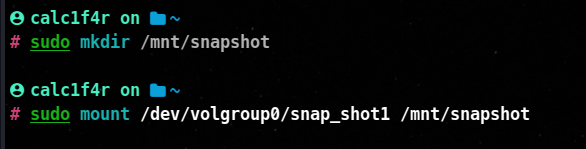
⚡Using the Snapshot
👩🏭 Steps
- Create a mount point
mkdir /mnt/snapshot
- mount
mount /dev/volume_group_name/snap_shot_name /moutpoint
📌 Backup Data
One of the key roles administrators must perform is data backups.
Backing up data is crucial for protecting against data loss caused by hardware failure, software issues, or human errors. It ensures data can be easily restored and prevents irreversible damage or loss of valuable information. To ensure we don’t ever lose our data we should have a backup plan.
👩🏭Steps before backup
- Firstly we will select a backup medium in which we will push our data, in today’s world it would be the cloud but can be anything like hard drives pen drives etc.
- Then we will have to find a backup strategy on which we will focus on
- Selecting the backup Type: It is upon the administrator to choose which things to backup, we can have a full backup of the data (which takes the most time) or an Incremental backup option in which we only backup files that have been modified since the last backup (fastest option) or Differential in this backup option we only backups the file that has been modified since the last full backup.
- Determining what to back up: Apart from the chosen directories, we should at least backup these dirs
/root, /home, var,/etc
📌 Backup using Compression :
When working with Linux there are various tools for conducting backups. Some of them have been already discussed in our blog 1 of the series. Now we will go through some of the additional utilities which can be used when taking backups.
⚡Using cpio for backup
The cpio utility can be used to make archive files like tar.
Creating an archive
To create a new archive using cpio, you can pipe the list of files you want to include into the cpio command and redirect the output to a file or another command for further processing. For example:
find /path/to/directory -depth | cpio -o > archive.cpio
In this example, the find command is used to generate a list of files in the /path/to/directory directory, and the output is piped into cpio with the -o option to create an archive named archive.cpio.
Extracting an archive:
To extract files from an existing cpio archive, you can use the -i option followed by the archive filename. For example:
cpio -i < archive.cpio
```
This command will extract the files from the `archive.cpio` archive into the current directory.
##### ⚡Using `dd` for disk cloning
The `dd` command is a great command for copying files, the master boot record (MBR) filesystems, and entire disk drives.
Copying data: To copy data from a source to a destination, you can use the `dd` command. The general syntax is as follows:
```bash
dd if=source_file of=destination_file [options]
if: Specifies the input file or device (source).of: Specifies the output file or device (destination).
The disk command allows administrators to perform disk cloning. To copy an entire disk we can do
dd if=/dev/sda of=/dev/sdb
The dd command can even create an image file of an entire hard disk. Again, the syntax is
dd if=/dev/sdc of=/mnt/drive/backup
To also copy the mbr/gpt partition table
dd if=/dev/sdc of=/tmp/backupfile bs=512 count=1
This tells to copy the starting 512 blocks of the hard drive.
🐧 Managing Linux Hardware :
📌 How is understanding connected important?
Hackers need to manage hardware in a Linux environment for these reasons:
- System Architecture: Understanding hardware components help you identify vulnerabilities and potential attack vectors in the system.
- Exploiting Hardware Vulnerabilities: Hackers can take advantage of weaknesses or specific hardware features by knowing the specs and configurations.
- Low-Level Control: Managing hardware enables hackers to manipulate and control the system at a lower level. This level of control is essential for tasks like firmware modification, BIOS/UEFI exploitation, or direct hardware access through techniques like bus snooping or chip-level attacks.
- Bypassing Software-Based Security: By tampering with hardware components or modifying firmware, hackers can bypass software security measures. By implanting malicious code, rootkits, or backdoors into the hardware, they make it difficult for traditional security solutions to detect or mitigate their activities.
📌 Discovering Devices
⚡Displaying Usb Devices
The lsusb command is used to list the USB devices connected to your Linux system. It provides information about the USB devices such as their vendor and product IDs, bus number, device number, and other details. Here’s how to use the lsusb command:
lsusb
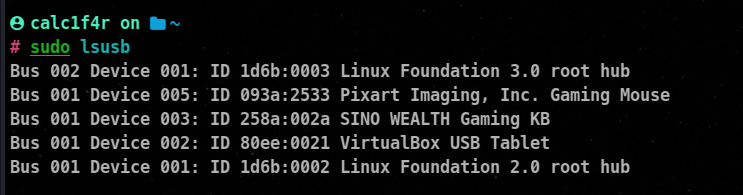
🔥 The root hub is responsible for communicating with devices attached to hub ports and the hub controller. It monitors devices being placed on, manages power for devices on the host’s ports, and manages communication on the controller’s bus.
🔥 Bus : A system device used to transfer data b/w devices.
The id numbers in the output are in the format: `manufacturer:device-id
, you can get more info from the device ids of the device by visiting here
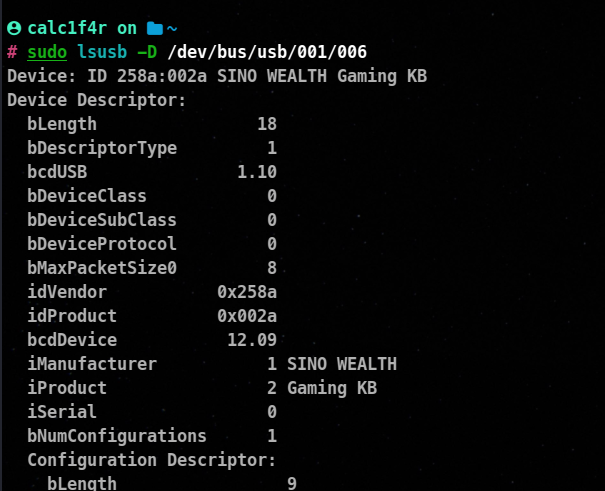
To find more info about the cli you can try this command.
lsusb -D /dev/bus/usb/<bus_number>/<device_number>
 w
w
🔥 Tip: You can use -t switch to get a tree structure.
⚡Displaying PCI devices
What are PCI devices?
PCI devices are like add-on components that you can connect to your computer’s main circuit board (motherboard) to give your computer extra abilities. They come in the form of small cards that fit into slots on the motherboard. Each PCI device has a specific job, like providing network connections, sound, or graphics. When you plug a PCI device into your computer, you need to install special software called drivers that allow your computer to communicate with the device.
The lspci command is used in Linux to list all the PCI (Peripheral Component Interconnect) devices connected to your computer. It provides detailed information about the PCI devices, such as their vendor and device IDs, the bus they are connected to, the type of device, and other relevant details.
You can get ideas about connected network adapters, graphics cards, sound cards, storage controllers, and USB controllers.
lspci
🔥use -v or -vv to get more info
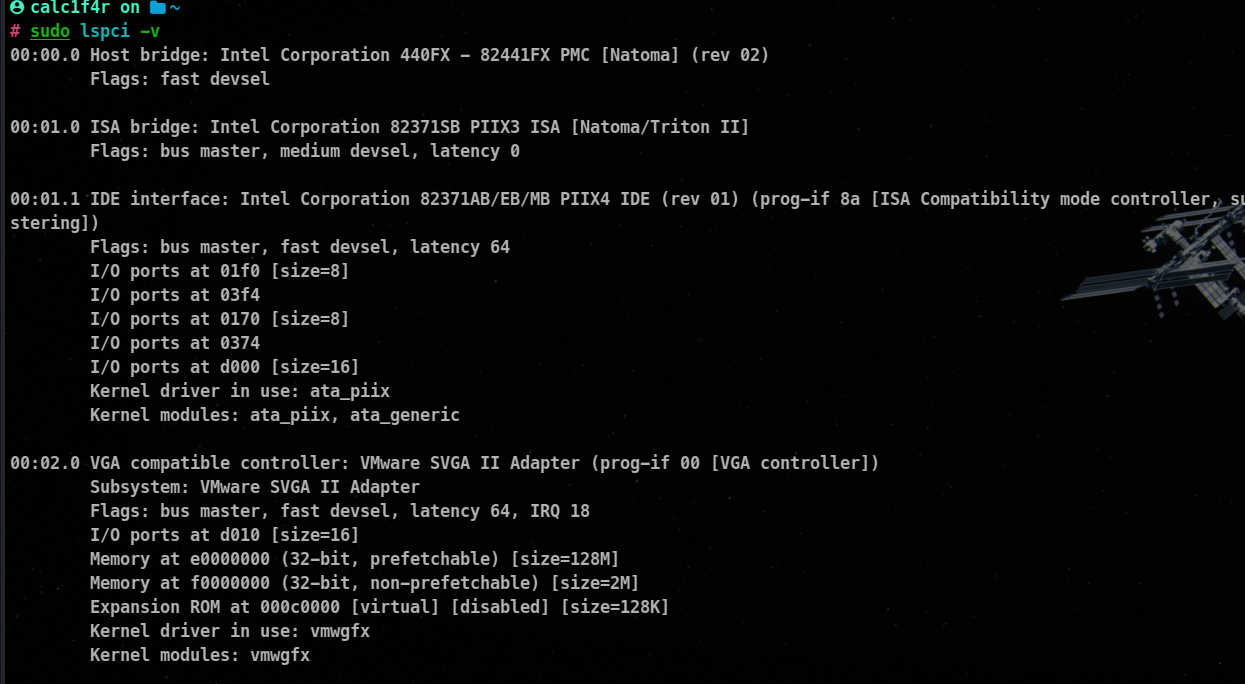
The format of the lspci command is Bus:Device:Function Class Vendor Name
📌 Configuring Bluetooth
Bluetooth is a wireless communication technology that allows devices to connect and exchange data over short distances. It enables various devices, such as smartphones, tablets, laptops, headphones, speakers, keyboards, and mice, to communicate and interact with each other without the need for cables. It uses both frequencies 2.4 or 5 ghz.
To use bluetooth commands bluez package must be present at your system.
Turning on Bluetooth services
systemctl enable bluetooth
Viewing the list of available bluetooth controllers
bluetoothctl list
Viewing List of devices available to connect
bluetoothctl scan on
To connect to bluetooth device
bluetoothctl select <mac_Addr of device>
I didn’t have an external Bluetooth card at the time present so I can’t show the screenshots here.
📌 Configuring Wi-Fi
Wi-Fi is a wireless technology that allows devices to connect to the internet or communicate with each other through radio waves.
Interfaces available
|Interface Name|Description|
|—|—|
|lo|Loopback|
|eth|Ethernet interface|
|wlan|Wireless network Interface|
⚡Scanning for Network Devices
There are various commands to scan for network interfaces.
ip link show

ifconfig -a
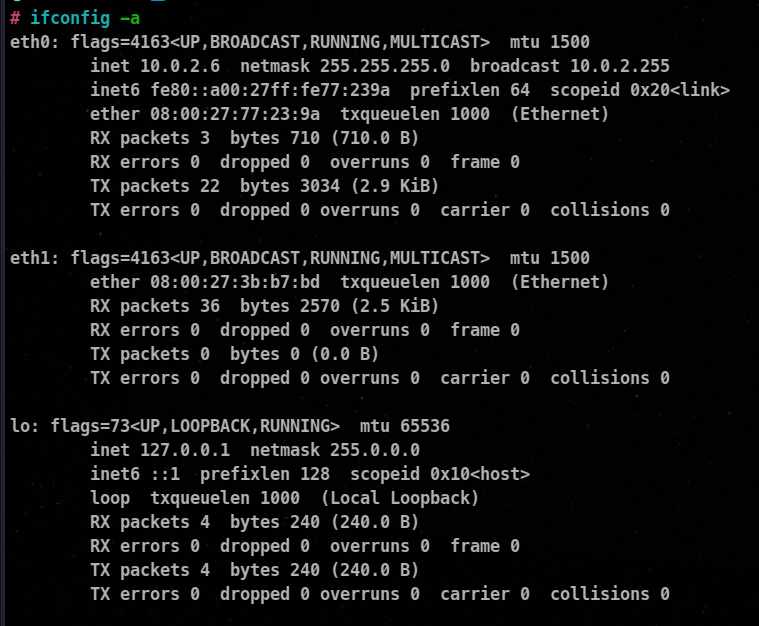
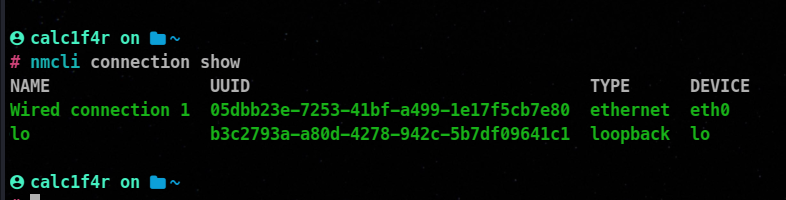
nmcli connection show
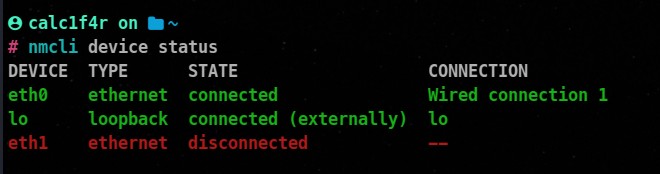
nmcli device status
netstat -i

⚡Configuring Wifi
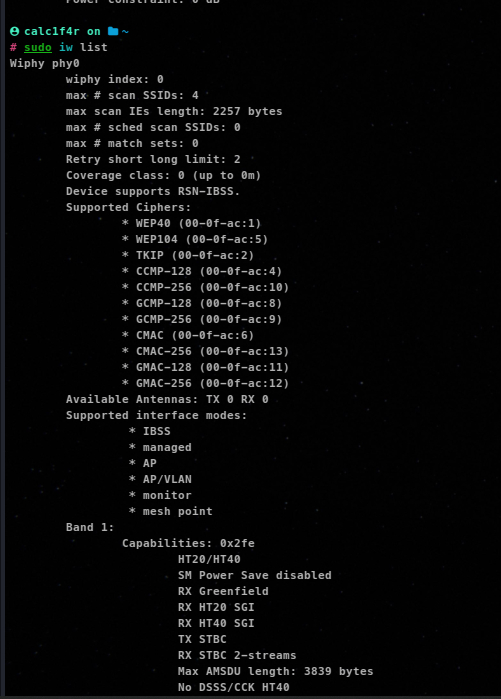
The iw command is used for configuring and managing wireless network interfaces on Linux systems. Here are a few examples of how to use the iw command.
To list available wireless interfaces:
iw list
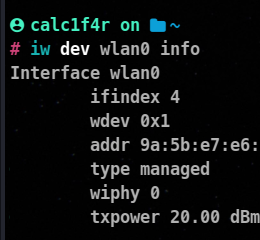
To get detailed information about a specific wireless interface:
iw dev <interface_name> info
To scan for available Wi-Fi networks:
iw <interface_name> scan
To connect to a specific Wi-Fi network:
iw <interface_name> connect <SSID>
For password protected
iw dev <interface_name> connect <SSID> key <password>

To disconnect from the current Wi-Fi network:
iw dev <interface_name> disconnect
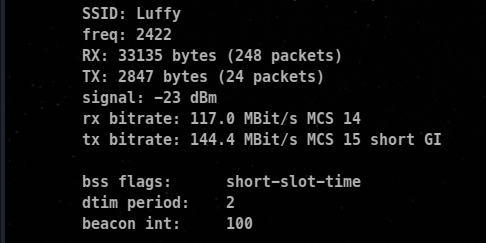
To display the current connection status and statistics:
iw dev <interface_name> link
📌 🎇Conclusion :
In conclusion, in this third blog of our “Linux for Hackers” series, we explored two essential topics: Logical Volume Management (LVM) and managing hardware in Linux.
We learned that LVM provides a flexible and efficient way to manage disk space, allowing hackers and system administrators to adapt storage configurations dynamically. From creating and resizing logical volumes to leveraging snapshot and mirroring capabilities, LVM equips us with the tools needed to optimize our storage infrastructure.
Furthermore, understanding how to effectively manage hardware in Linux is vital for successful hacking endeavors. By mastering device files, module management, and hardware configuration, we can maximize the performance and compatibility of our hardware components, ultimately enhancing our hacking capabilities.
With the knowledge gained from this blog, you now possess a solid foundation in LVM and hardware management in Linux. These skills will undoubtedly empower you in your hacking pursuits and enable you to leverage the full potential of the Linux operating system.
Stay tuned for the next installment in our series, where we’ll continue to delve into the fascinating world of Linux and uncover more tools and techniques for hackers. Until then, keep exploring, learning, and pushing the boundaries of what you can achieve with Linux. Happy hacking!