Hello Friend. Today we’re going to talk about C2 Specifically Covenant C2.
First Let’s understand what’s Command & Control (C2) Server.
To better understand what a C2 framework is at its most basic level, think of a Netcat listener (the C2 server) that is capable of handling many reverse shells calling back at once (C2 Agents). It’s a server but for reverse shells. Unlike Netcat, almost all C2 frameworks require a special payload generator. This is usually a feature that is built into the framework itself. For example, Metasploit is a C2 Framework that has its payload generator, MSFVenom.
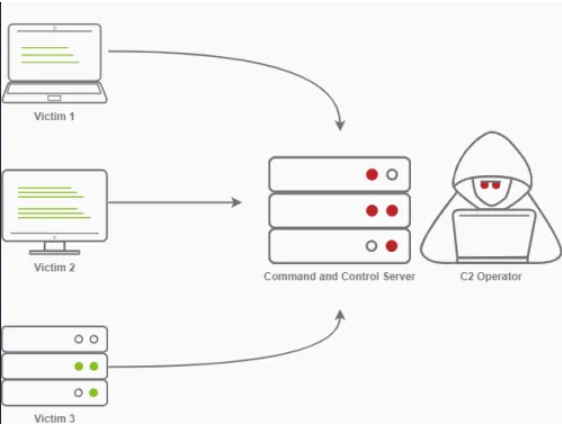
C2 Infrastructure is a set of programs used to communicate with a victim machine. This is comparable to a reverse shell, but is generally more advanced and often communicates via common network protocols, like HTTP, HTTPS and DNS & also has advanced session management and post Exploitation features.
Command and Control Structure
C2 Server: The C2 Server serves as a hub for agents to call back to. Agents will periodically reach out to the C2 server and wait for the operator’s commands.
Agents / Payloads: An agent is a program generated by the C2 framework that calls back to a listener on a C2 server. Most of the time, this agent enables special functionality compared to a standard reverse shell. Most C2 Frameworks implement pseudo commands to simplify the C2 Operator’s life. Some examples of this may be a pseudo command to Download or Upload a file onto the system. It’s important to know that agents can be highly configurable, with adjustments on the timing of how often C2 Agents beacon out to a Listener on a C2 Server and much more.
Listeners: a listener is an application running on the C2 server that waits for a callback over a specific port or protocol. Some examples of this are DNS, HTTP, and or HTTPS.
Beacons: A Beacon is the process of a C2 Agent calling back to the listener running on a C2 Server.
Introduction to Covenant C2
Covenant is a .NET command and control framework that aims to highlight the attack surface of .NET, make the use of offensive .NET tradecraft easier, and serve as a collaborative command and control platform for red teamers.
Covenant has several key features that make it useful and differentiate it from other C2 frameworks:
- Intuitive Interface — Covenant provides an intuitive web app to easily run a collaborative red team operation.
- Multi-User — Covenant supports multi-user collaboration. Many users can interact with the same Covenant server and operate independently or collaboratively.
- Listener Profiles — Covenant supports listener “profiles” that control how the network communication between Grunt implants and Covenant listeners looks on the wire.
- Encrypted Key Exchange — Covenant implements an encrypted key exchange between Grunt implants and Covenant listeners that is largely based on a similar exchange in the Empire project, in addition to optional SSL encryption. This achieves the cryptographic property of forward secrecy between Grunt implants.
- Dynamic Compilation — Covenant uses the Roslyn API for dynamic C# compilation. Every time a new Grunt is generated or a new task is assigned, the relevant code is recompiled and obfuscated with ConfuserEx, avoiding static payloads. Covenant reuses much of the compilation code from the SharpGen project.
- Tracking Indicators — Covenant tracks “indicators” throughout an operation, and summarizes them in the Indicators menu. This allows an operator to conduct actions that are tracked throughout an operation and easily summarize those actions to the blue team during or at the end of an assessment for deconfliction and educational purposes.
Installation
There are 2 options via which you can download this. First is Docker & second via Dotnet Core
Note: It’s preferred to install it on docker (for ease) as without it we’ve to install .NET 3.1 (which is deprecated now, tricky to find & install on Linux Machines)
If you want to install via the second option check out this LINK
Here I’ll cover how to install it on Docker.
First, build the docker image
git clone — recurse-submodules https://github.com/cobbr/Covenant # Clone the repo into your local machine
cd Covenant/Covenant
docker build -t covenant . # build a docker image (takes some time)
After the last command when you get the below result, the image is successfully built.

Now, run Covenant within the Docker container (be sure to replace the “</absolute/path/to/Covenant/Covenant/Data>” with your absolute path!)”
docker run -it -p 7443:7443 -p 80:80 -p 443:443 — name covenant -v </absolute/path/to/Covenant/Covenant/Data>:/app/Data covenant
# The -it parameter is a Docker parameter that indicates that we should begin Covenant in an interactive tty, and can be excluded if you would not like to attach to the tty.
# The -p parameters expose ports to the Covenant Docker container. You must expose port 7443 and any other ports you would like to start listeners on.
# The -v parameter creates a shared Data directory between the host and the container. Be sure to specify an absolute path to your data directory, a relative path will not work.
# Once Covenant has been started, you can disconnect from the interactive interface at any time by pressing Ctrl+p and Ctrl+q consecutively.
After running the above command the Covenant C2 will start running & you can access that from your Attacker Machine by visiting HTTP[:]//127[.]0.0.1:7443 on your WEB browser.

After starting Covenant, you must register an initial user through the web interface. Navigating to the web interface will allow you to register the initial user.
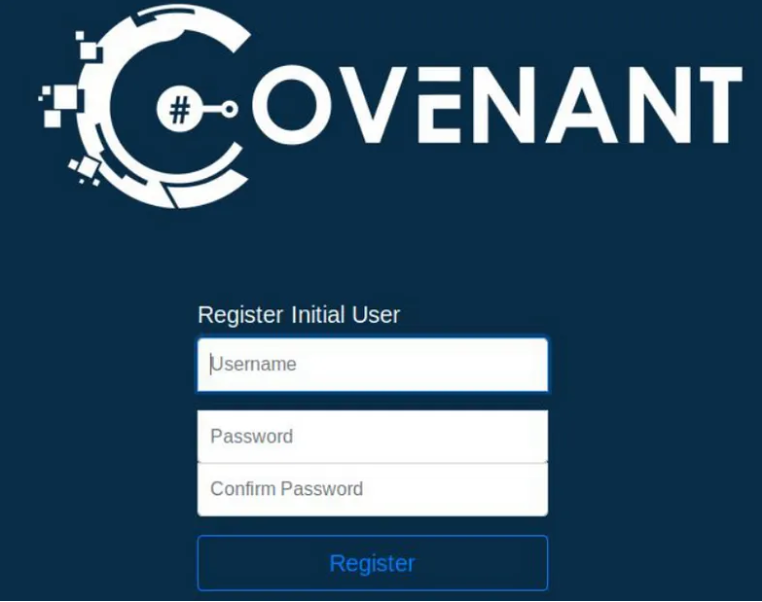
if everything goes well you’ll see this dashboard & now you’ve successfully installed the Covenant C2.
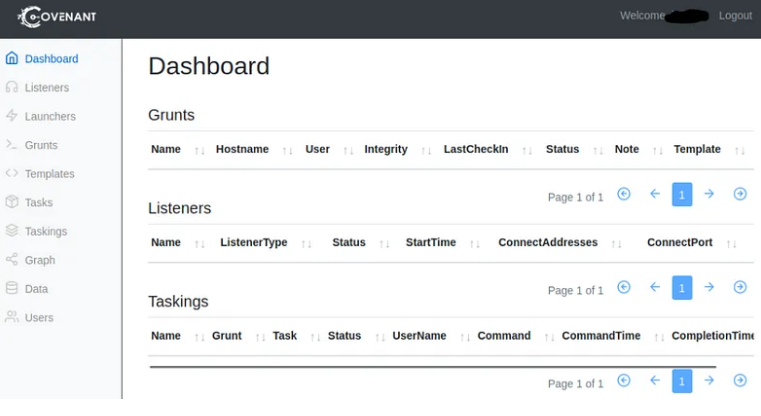
User Management
Covenant Users should be created for each operator to enable collaboration and so that actions can be tracked by operators.
Click on the “Users” navigation page in the sidebar to view a list of current users:
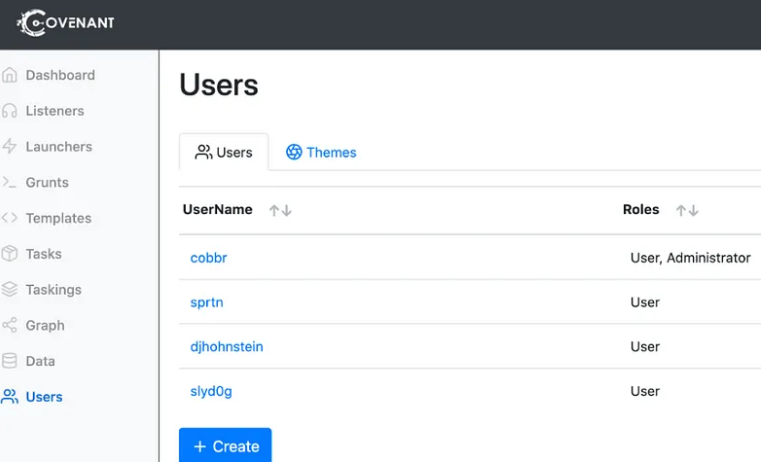
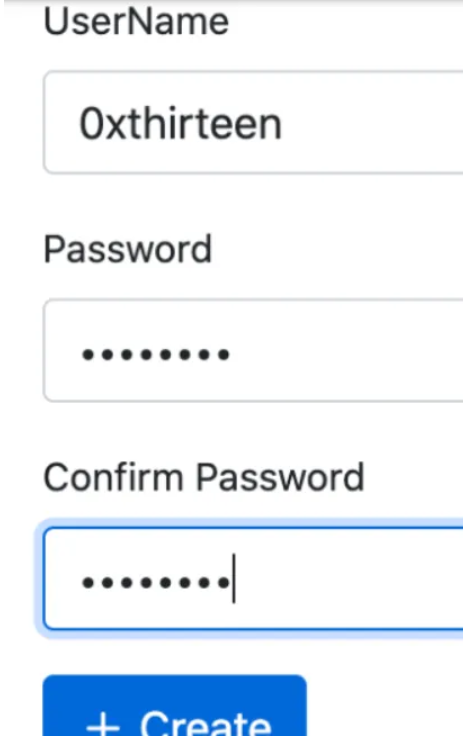
Click on the “Create” button to create a new user. Only an Administrative user can create new users. You’ll just need to select a username and initial password, which can be changed later.
Click on a User’s username to edit a user. You can change a user’s password, or edit the roles they belong to:
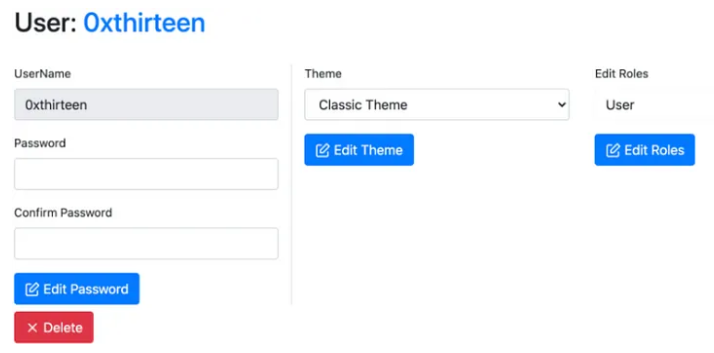
The following roles can be applied to a user:
- Administrator — An Administrator has the privileges to conduct user management such as creating and editing Covenant Users.
- User — A User can conduct operations on active Grunts.
- Listener — The Listener role is only used for Listeners, who must have an account to use Covenant’s API, but is not needed for operators.
Working with Covenant
When operating with Covenant, there are four main stages
- Creating a listener
- Generating a stager
- Deploying a grunt
- Utilizing the grunt
Creating a Listener
To create a listener, navigate to the Listeners tab from the side menu and select Create Listener.
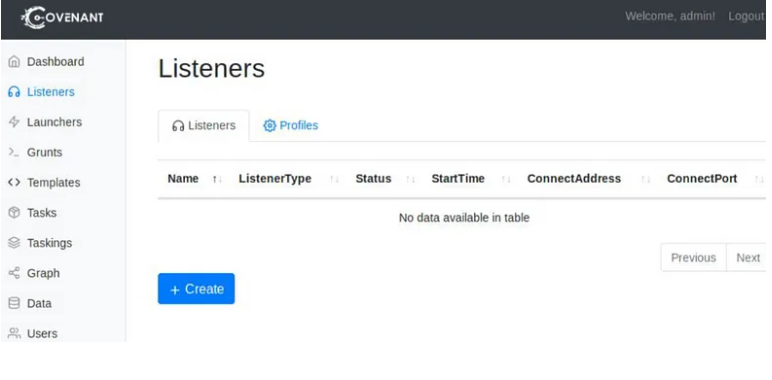
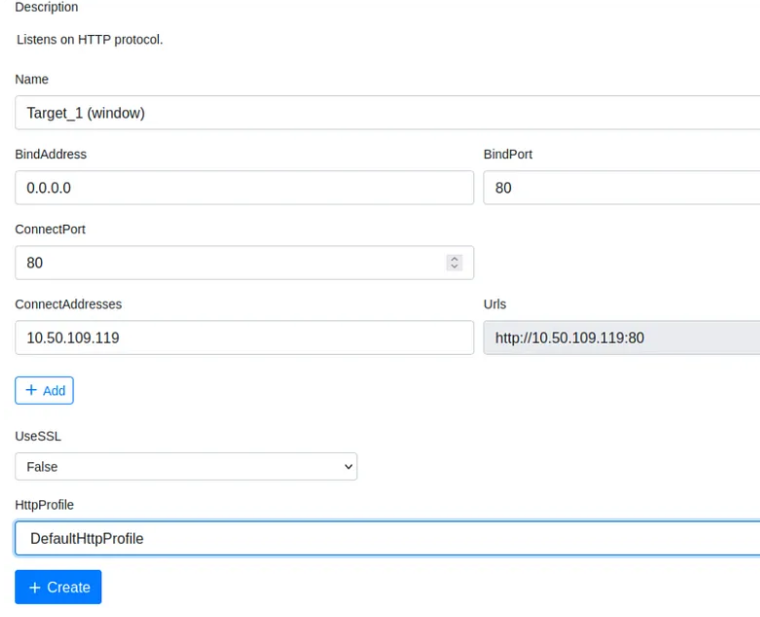
You will see several options to edit; each option is outlined below.
• Name (optional) will help to identify different listeners.
• BindAddress Local address listener will bind on, usually 0.0.0.0.
• BindPort Local port listener will bind on.
• ConnectPort Port to callback to, suggested to set to 80, 8080, or 8888.
• ConnectAddresses Addresses for the listener to callback to, hostname portion of the URL.
• URLs Callback URLs the grunt will be connected directly back to.
• UseSSL Determines whether or not the listener uses HTTP or HTTPS.
• SSLCertificate Certificate used by the listener if SSL is set to true.
• SSLCertificatePassword Password being used by the SSLCertificate.
• HttpProfile Profile used by the listener and grunt to determine communication behaviour.
Listeners are built off profiles; you can think of profiles like HTTP requests/pages that will serve as the channel that will handle all C2 traffic. There are four default profiles that Covenant comes with, outlined below.
• CustomHttpProfile Custom profile that does not require any cookies.
• DefaultBridgeProfile Default profile for a C2 bridge.
• DefaultHttpProfile Default HTTP profile.
• TCPBridgeProfile Default TCP profile for a C2 bridge.
Once created, the listener should appear within the Listeners tab. You can now start and stop the listener as needed.

Creating a launcher (to deploy a grunt)
From the Covenant GitHub, “Launchers are used to generate, host, and download binaries, scripts, and one-liners to launch new Grunts.”
There are ten different launchers to choose from within Covenant, each launcher will have its requirements (some may only run on specific OS etc.). Some Launcher types are outlined below.
• Binary Generates a custom binary to launch grunt, and does not rely on a system binary.
• Shellcode Converts binary to shellcode using donut, https://github.com/TheWover/donut
• PowerShell Generates PowerShell code to launch a grunt using powershell.exe.
• MSBuild Generates an MSBuild XML file to launch a grunt using msbuild.exe, https://lolbas-project.github.io/lolbas/Binaries/Msbuild/
• InstallUtil Generates an InstallUtil XML file to launch a grunt using installutil.exe, https://lolbas-project.github.io/lolbas/Binaries/Installutil/
• Mshta Generates an HTA file to launch a grunt using mshta.exe, https://lolbas-project.github.io/lolbas/Binaries/Mshta/
• Regsrv32 Generates an SCT file to launch a grunt using regsrv32.exe, https://lolbas-project.github.io/lolbas/Binaries/Regsvr32/
• Wmic Generates an XSL file to launch a grunt using wmic.exe, https://lolbas-project.github.io/lolbas/Binaries/Wmic/
• Cscript Generate a JScript file to launch a grunt using cscript.exe, https://lolbas-project.github.io/lolbas/Binaries/Cscript/
• Wscript Generate a JScript file to launch a grunt using wscript.exe, https://lolbas-project.github.io/lolbas/Binaries/Wscript/
Note: Please keep in mind that any of the launchers that rely on DotNetToJScript may not work on some of the latest versions of Windows 10 and Windows Server 2016 and/or may be signed by some AMSI providers.
Note: There are several options for each launcher, with each launcher having different options
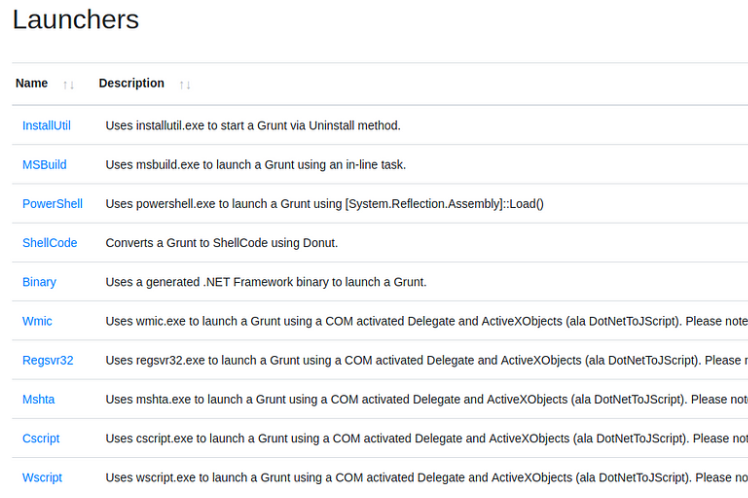
Let’s launch powershell.exe grunt for this simulation. You can just click on Powershell & you’ll see the further options on that grunt.
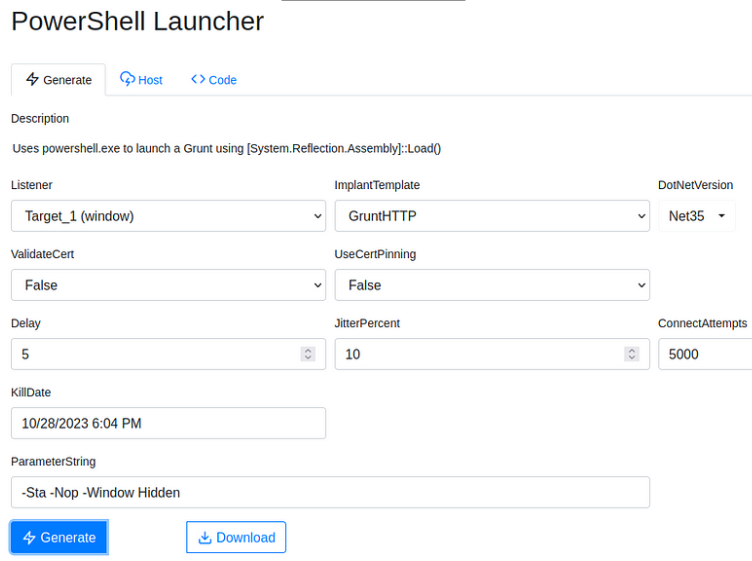
• Listener Listener the grunt will communicate with.
• ImplantTemplate Type of implant launcher will be used.
• DotNetVersion .NET version launcher will be used, dependent on ImplantTemplate.
• Delay Time grunt will sleep in between callbacks. A more considerable delay can aid in stealthy communications.
• JitterPercent Percent of variability in Delay.
• ConnectAttempts Amount of times Grunt will attempt to connect back to the server before quitting.
• KillDate Date specified grunt will quit and stop calling back.
(This Launcher Switches)
- ValidateCert — The ValidateCert option determines if the Grunt will validate the listener’s SSL certificate to prevent MiTM attacks. There are scenarios where target network proxies can interfere with certificate validation, and it’s preferable to not validate the certificate. This option is only relevant when using the HTTP, and will only be displayed if you have selected the HTTP CommType.
- UseCertPinning — The UseCertPinning option determines if the Grunt will use cert pinning of the listener’s SSL certificate to prevent MiTM attacks. There are scenarios where target network proxies can interfere with certificate pinning, and it’s preferable to not perform cert pinning. This option is only relevant when using the HTTP, and will only be displayed if you have selected the HTTP CommType.
Note: To create a basic launcher, we need to add the Listener and ImplantTemplate
Once created, the launcher will be downloaded or output a one-liner payload that can be copied. You can then use the launcher as needed to deploy grunts.

Executing the Grunt & Receiving connection on Listener
To deploy a grunt, you will only need to transfer your launcher to your target machine & execute the payload using your preferred method
Note: The way of executing will vary based on what launcher you selected/or used

Once executed, the grunt checks back into the server & appears within the Grunt tab.

Click on the “Name” of the grunt to interact with it. (as we had used Powershell’s launcher we’ll also get the PS session of the target’s machine)

Some commands are native within Covenant and other controls that are native to Windows can be executed in several ways.
For the detailed interaction view, click on the name of the Grunt you would like to interact with, and this will bring you to a detailed page with all of the grunt’s information:
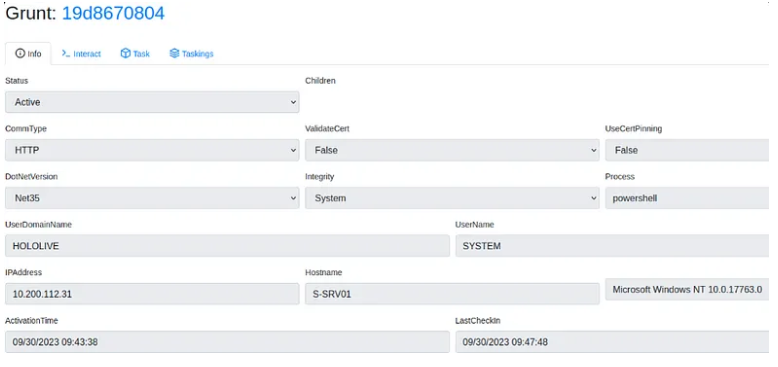
The Grunt page includes four main tabs, each used for a different purpose:
- Info — The Info tab displays all the detailed information about the Grunt. This includes information about the implant as well as information about the user and system on which the implant is running. You are also able to edit some of the Grunt’s information on this page. You can edit the Name, Note, Delay, JitterPercent, ConnectAttempts, and KillDate from this page. Keep in mind that editing the Delay, JitterPercent, or KillDate results in a task being assigned to the Grunt.
- Interact — The Interact tab provides a command-line-like interface. Operators will likely spend most of their time in this interface. The interface is scrollable and vertically resizable, command suggestions are tab-completable as you type, and you will see updates in real time so that you can see what other operators are doing.
- Task — The Task tab provides a dropdown dialogue where an operator can select a specific task to be executed and fill in parameters in dialog boxes. The Task tab provides an alternative interface for assigning Tasks purely through a GUI. This view enables operators that are not comfortable with the command-line interface, or if command-line parsing is giving an operator some trouble.
- Taskings — The Taskings tab shows the grunt’s command history in a searchable, table view. This allows an operator to click on taskings to get more detailed information for any specific tasking, task, or user.
Using Build-in Covenant C2 Tools
Covenant C2 by default comes with many tools such as Mimikatz, PowerSploit, Nishang, SharpUp & many others. we can easily use these tools from the grunt’s shell (we used to interact with the target), thus it removes the overhead of uploading binaries & tools to the target system and then running them.
Let’s use SharpUp Script.

More about Covenant C2
I believe that there are still too many modules to cover such as Graph View, Building & Scheduling Tasks, C2Bridges, using API, building custom launchers, Integrating more external tools & many more. You can learn more about it via the following articles & wiki from this C2 Dev team.
LINK and LINK
That’s it, Hope you’ve learned something new 🙂
Question or any suggestion for a new Topic? Ping me on my socials