
Welcome to the second blog of our journey into web application security testing with burp suite. In this blog, “Burp Suite 101 - Exploring the very Basics,” we’ll dive into the fundamental aspects of Burp Suite. Let’s dive.
Five crucial topics:
- Burp Projects: Organize and manage your testing efforts.
- Burp Dashboard: Your gateway to all things Burp Suite.
- Burp Configuration: Set up your environment for optimal performance.
- Getting Started with Burp: Learn the basics, including setup, navigation.
🐞 Dashboard
When you start your burp the first window you see is the dashboard. The Burp main dashboard is divided into four quadrants
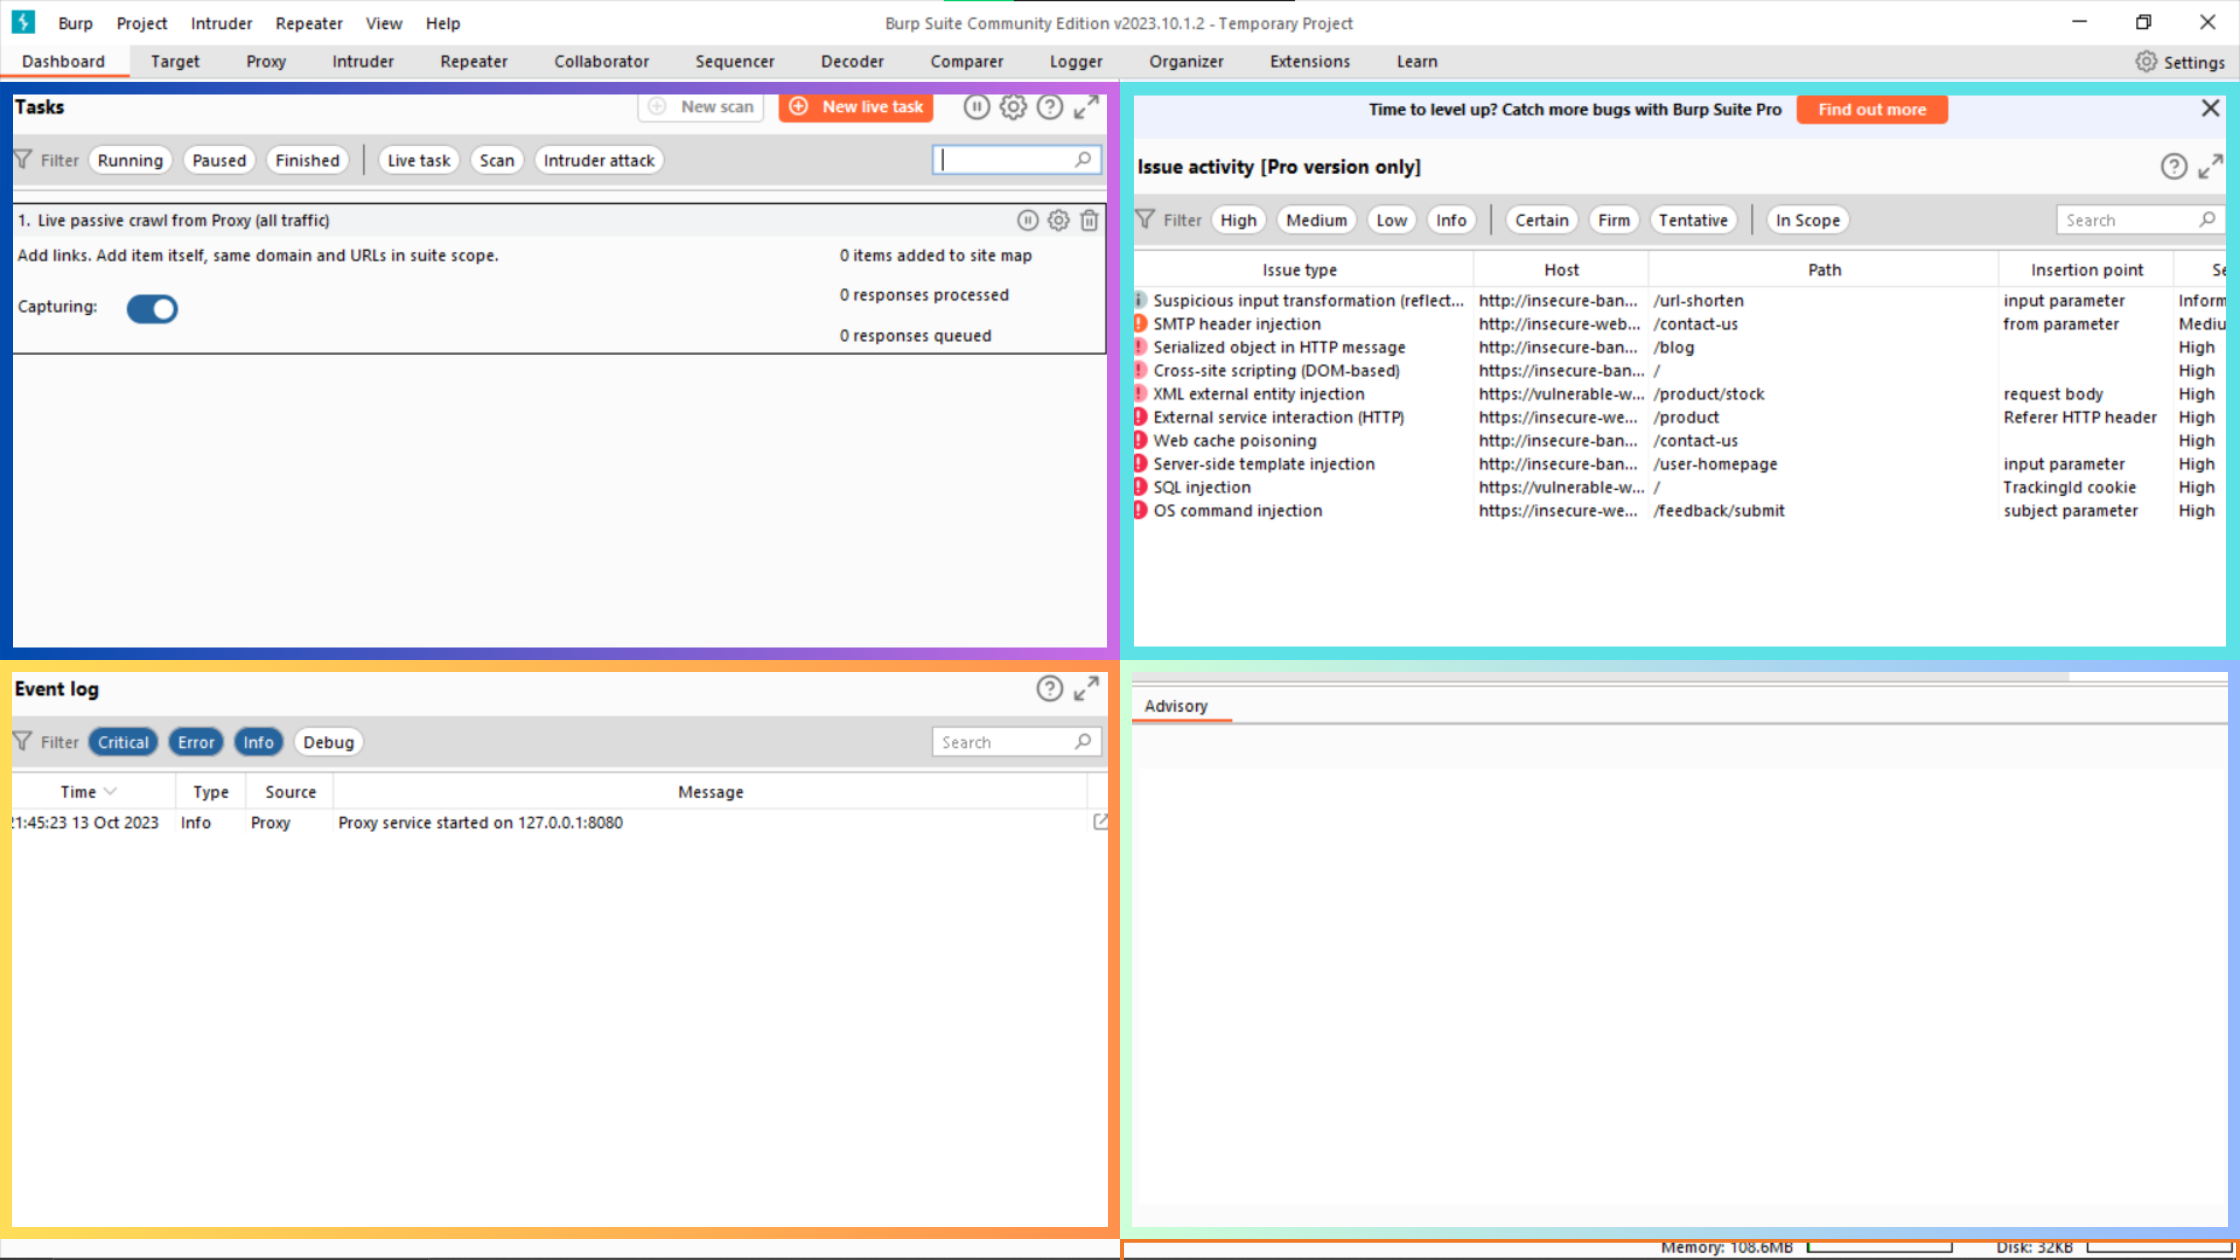
1. Tasks :
All of the automated tasks that are active, on hold, or finished are listed in the Tasks panel of the Burp Suite Dashboard. Tasks can be used for a range of activities, including:
i. Checking for vulnerabilities in websites and web apps
ii. Searching websites for fresh content
iii. Creating and testing attacks - Automating routine security testing chores - Monitoring and altering HTTP traffic
Some of the tasks which you can create are :
i. A Live audit task scans requests for vulnerabilities as they are intercepted by the Burp Suite proxy.
ii. A Live passive crawl task adds new resources to the Burp Suite Target site map as they are discovered.
iii. A Scanner task scans a website or web application for vulnerabilities using the Burp Suite Scanner.
2. Event log :
The Burp Suite Dashboard’s event log contains a record of every important event that happens while tasks are being completed. This covers occurrences like:
i. Start and end timings for tasks
ii. notifications produced by other tools and the scanner
iii. updates on progress
iv. Mistakes and alerts
3. Issue Activity
A table listing every issue that Burp Suite has found is called “issue activity” and may be found on the Burp Suite Dashboard. This covers problems that the tools Scanner, Intruder, and Sequencer found.
For every issue, the following details are included in the Issue activity table:
i. Severity: A measure of the problem’s seriousness, from Low to High.
ii. Confidence: A scale from Low to High representing Burp Suite’s level of confidence in the result.
iii. Type: The type of issue of the problem, such as SQL Injection or Cross-Site Scripting (XSS).
iv. A brief description of the problem.
v. Location: The issue’s exact location, such as a requested URL or IP address.
🔴 This is a premium feature which is not available in burp community edition.
4. Advisory
More information about the vulnerabilities that have been found, including references and possible fixes, is provided in the advisory section. Reports containing this information can be exported. This area of Burp Suite Community might not reveal any vulnerabilities.
🐞 Navigation
In burp suite , we navigate through the top menu bars ,which allows us to switch between modules and access various sub-tabs within each module.
🐱🐉 Modules
Modules in the basic sense are some basic features such as repeater, intruder, scanner and others.

You can select these modules by clicking them.
Sub-tabs
Each module have some sub-tabs ,which will be accessed when module is selected, In short they contain various options which are module specific.
Example:

In the screenshot , we can see various options which are for specifically proxy module.
Shortcuts for navigation to different modules
| |
|---|
| Ctrl+T | Toggle Proxy interception |
| Ctrl+Shift+T | Switch to Target |
| Ctrl+Shift+P | Switch to Proxy |
| Ctrl+Shift+S | Switch to Scanner |
| Ctrl+Shift+I | Switch to Intruder |
{Additional} Detaching
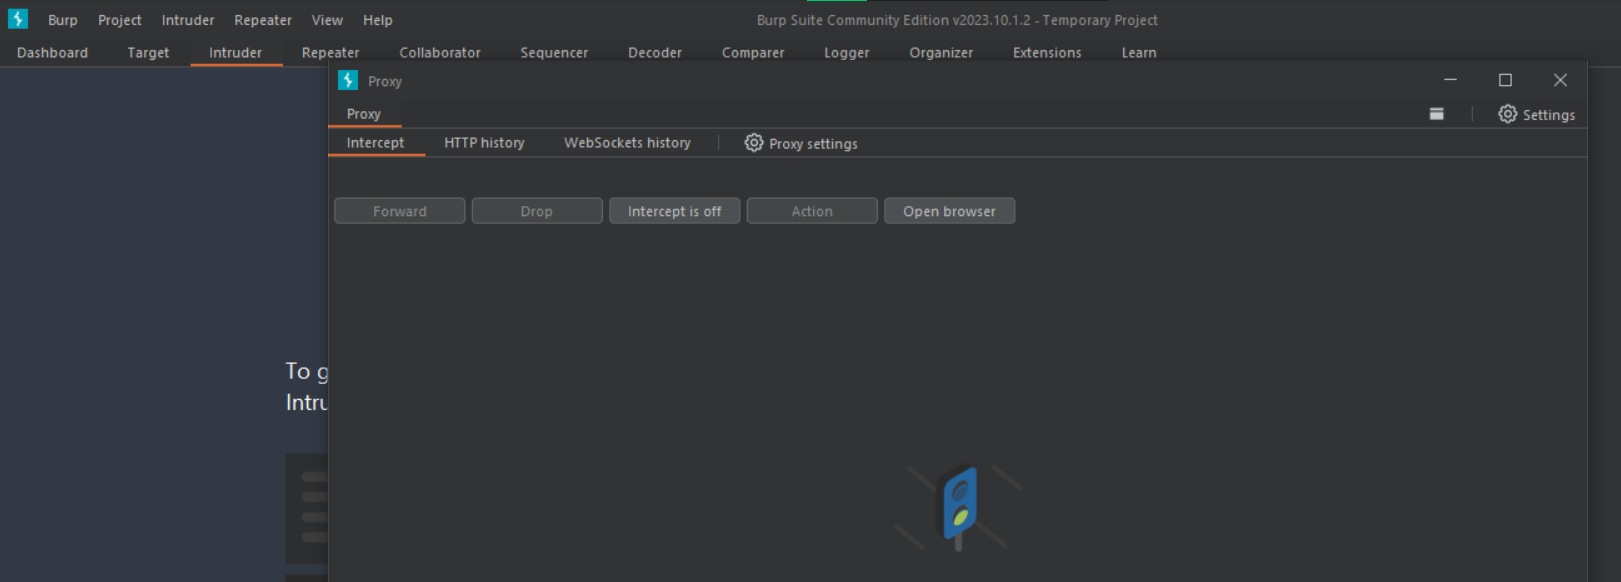
In case you want to use a module in a whole screen, then you can deattch and use it a separate window as well !
To do this, you just need to right-click on the burp module you want to deattch and then a pop window opens up -> click on deattach then.
In this example, you can see it has been deattached.
🐞 Burp Projects {Premium}
A Burp Suite project is a file that stores all of the data and configuration settings for a particular security testing project. This includes things like the target application, the tools and settings used to test the application, and the results of the tests.
This allows you to achieve this
- The ability to save and load all of the data and configuration settings for a particular security testing project.
- The ability to organize your work and make it easier to resume testing where you left off.
- The ability to share your work with other people, such as other security testers or developers.
To create a new project
- Open Burp Suite.
- Go to File > New project.
- Enter a name for your project and choose a location to save the project file.
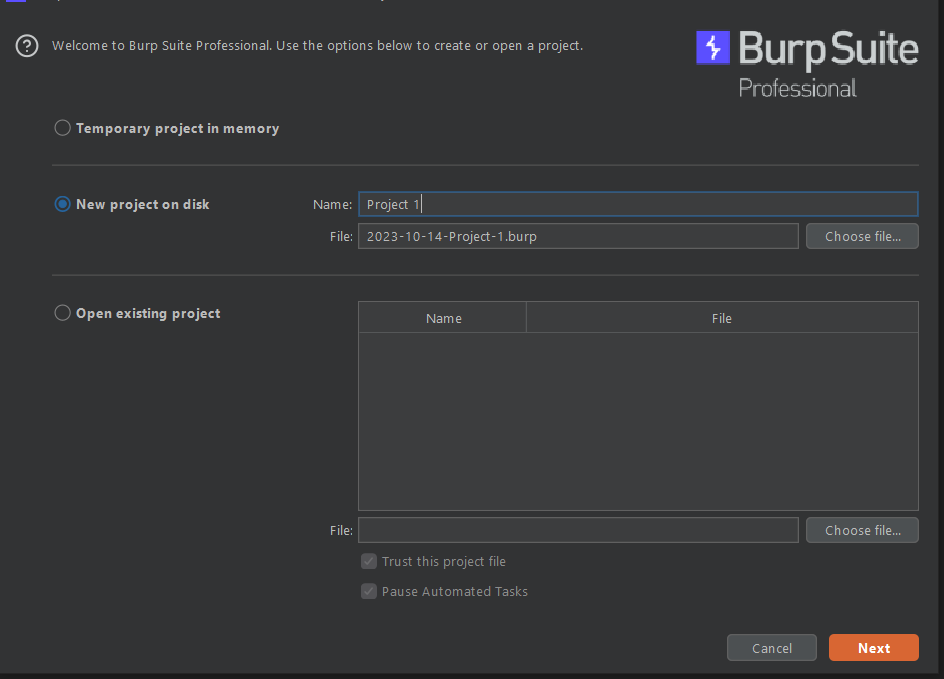
- Click Next.
- Choose a configuration for your project. You can either use the default configuration, use the settings from a previous project, or load a configuration file.
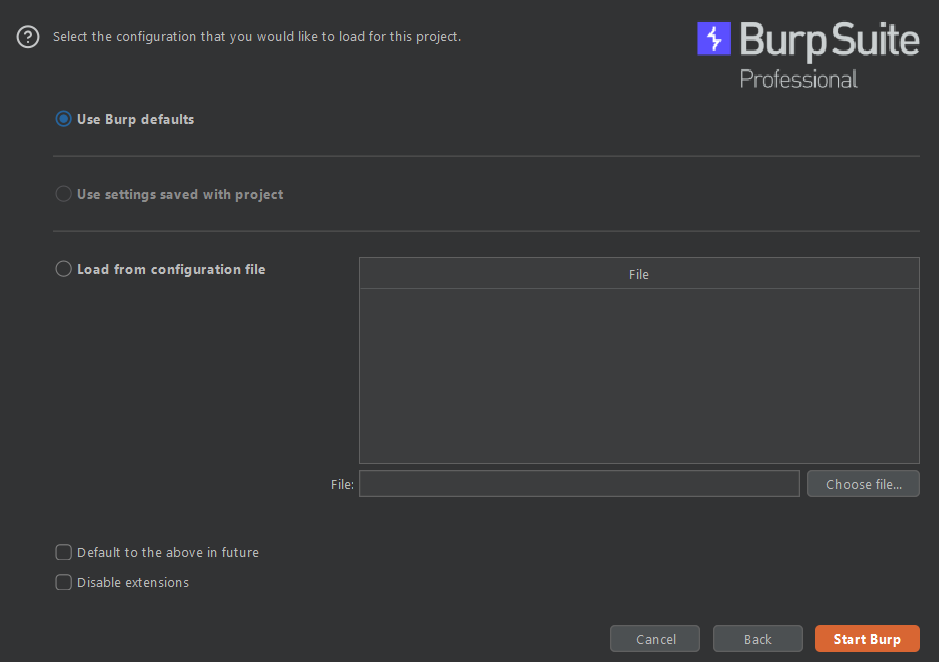
- Click Next.
- Review the project settings and make any necessary changes.
- Click Finish.
🔥 A temporary project in Burp Suite is a project that is not saved to a disk file. All of the data for the project is stored in memory, and it is lost when you close Burp Suite
Temporary projects can be useful for quick tasks where you don’t need to save your work.
In burp community , as you can’t save the projects so everytime you work you are working on the temporary project.
🐞Settings/Burp configuration
In burp, there are two types of settings
- Global settings : These are settings which are always applicable on all the project where is temporary.
- Project settings : These settings are specific to the current project and apply only during the session.
Settings
To view settings , you just need to clock on the right of top menu bar.

And then you will be approached with the whole settings menu.
From here, you can change every settings even module specific settings.
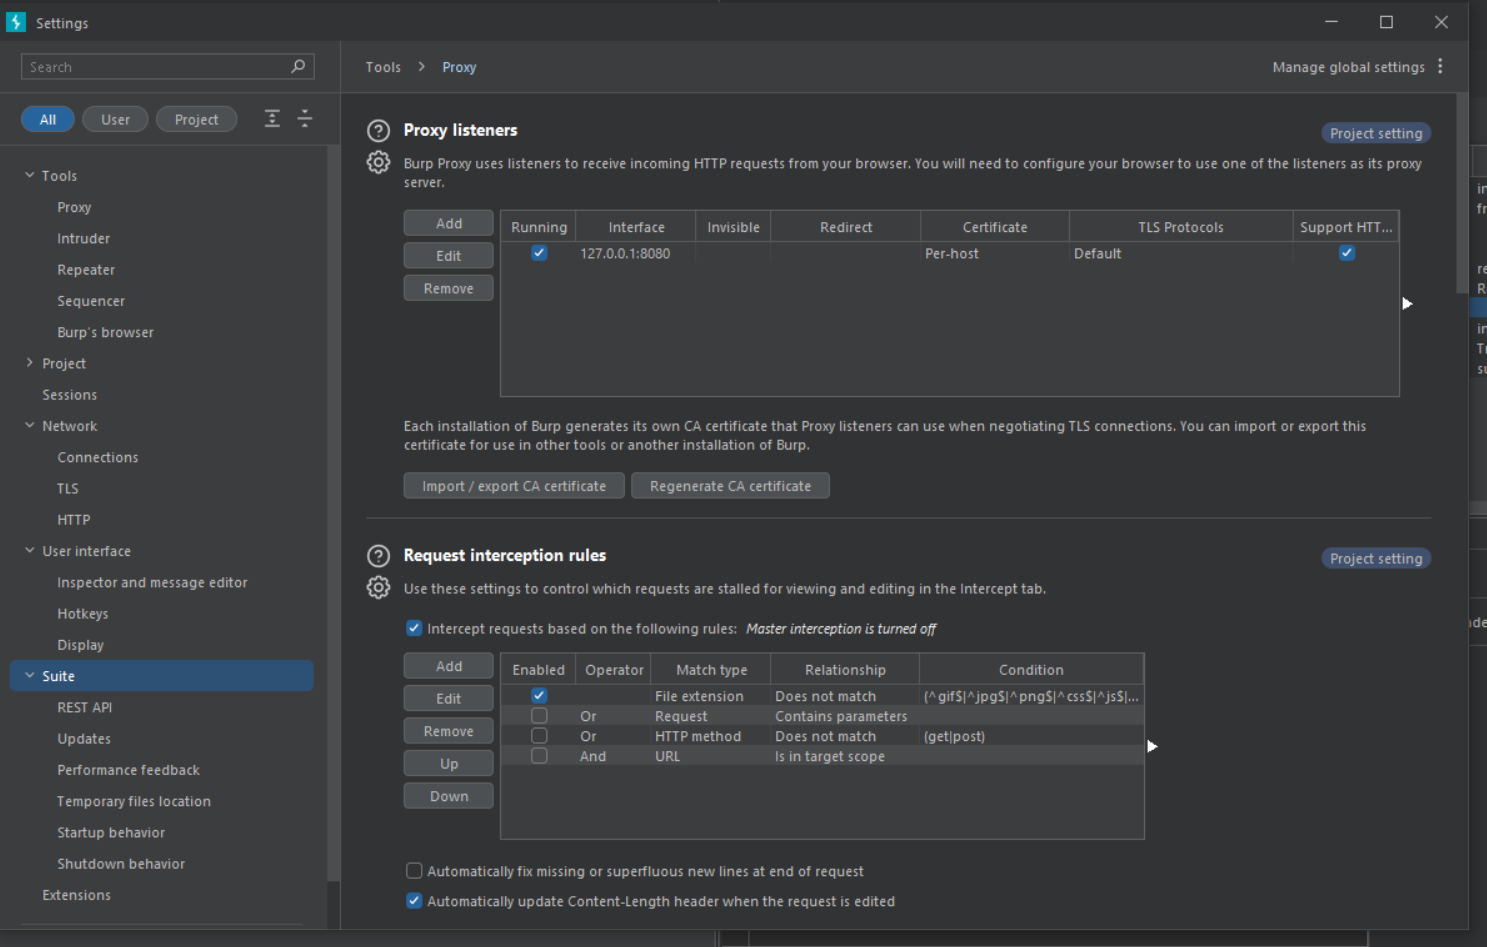
A menu can be found on the left side of the Settings window. You can swap between several settings with this menu, including:
- Search: Allows you to use keywords to look up certain settings.
- Type Filters : Filters the settings for the global and local scope.
- Categories : Allows selecting settings by category.
Short quide to change the appearance of your burp/changing theme to dark
- Go to settings
- Type themes in the search box
- click on the dark theme

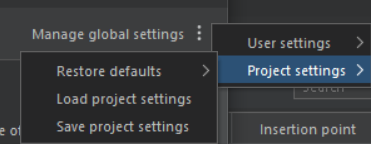
To manage settings for the global scope or project scope , click on the Manage global settings, then after that you can choose to do that.
🐉 Conclusion
🎉 Congratulations on completing “Burp Suite 101: Exploring the Very Basics.” You’ve now got a rock-solid foundation for working with this essential web application security testing tool.
In this blog, we’ve covered key topics:
- Burp Projects: The importance of organized testing environments.
- Burp Dashboard: Your control center for project management.
- Burp Configuration: Tailoring Burp Suite for optimal performance.
- Getting Started: Setting up Burp Suite and integrating it with your browser.